Blog

Peanut Sauce

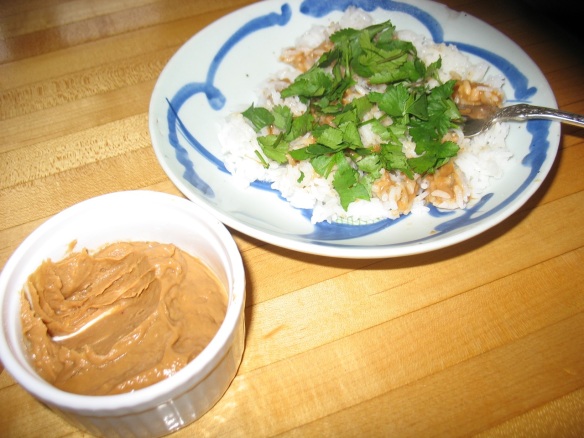
Rice with leftover peanut sauce and lots of cilantro.

I have at least five different blog posts started in my head. These last few spring-like days  here in Portland have been so energizing and glorious maybe that’s translated into increased brain activity. So I’d love to muse about all the birds I hear singing all of sudden every morning or the green garlic stalks that seem to have sped up their growth a bit or the late afternoon light or that wonderful springy, damp earth sort of smell. I’d also like to write about the talk I’m putting together to give at Slow Food Portland’s Annual Potluck this Sunday (there are still seats available and it is likely the best potluck in Portland and some of the most relevant content) I’d also like to write about several totally last-minute cook-with-what-you-have meals I’ve tossed together lately. So I think I’ll do the latter and focus on just one.

The other day I was in need of a quick hearty meal for our family. I had leftover black bean soup in the fridge so I cooked a pot of white rice (I was in a hurry and I love white rice but tend to cook brown rice more frequently these days) to make the soup stretch. As I was heating up the soup I realized that this was going to be just one-too-many bean meals in a row for my husband. I’ve been doing a lot of recipe testing with beans lately and as much as my dear husband likes most of them I know he doesn’t love them quite as a much as I do.

I rummaged through the fridge in search of some other quick inspiration for him and there was a little dish of leftover peanut sauce I had forgotten about. Then I remembered a blog post I had recently read by one of my favorite bloggers (David Lebovitz). Although primarily a baker he sometimes writes about savory foods and had posted a recipe for peanut sauce (that I have not tried) and talked about how he used to just dollop it on white rice for a quick meal on the go when he was still working in restaurants. So there it was: I had my hot rice, my little dish of peanut sauce and plenty of cilantro. So that’s what Brian got for lunch and he was very happy. I ate the bean soup AND a bowl of rice like his and had to agree that the latter was more fun! The hot rice loosened up the peanut sauce and brought out the flavors of lime and chili and the cilantro was cooling and lively. It hit the spot.

So, if you make the below recipe for peanut sauce you should plan to use three-quarters of it to toss with some spaghetti or rice noodles and some finely sliced raw veggies and save the remainder for the above dish!

I have come to love this particular peanut sauce that I came across on another food blog I follow–Skillet Chronicles–by Aleta Watson.

Thanks all you fellow bloggers for the constant inspiration!

Peanut Sauce

Peanut Sauce

–only slightly adapted from Skillet Chronicles

generous ½ cup smooth peanut butter

2 tablespoons toasted sesame oil

2 tablespoons soy sauce

1 tablespoon grated ginger

4 garlic cloves, pressed or minced to a paste

3 tablespoons fresh lime juice

½-1 teaspoon chili flakes or hot chili sauce (to taste)

1 tablespoon rice vinegar

1 tablespoon  brown sugar

2 tablespoons hot water

Blend all the sauce ingredients together in a small bowl until smooth and set aside. Toss with cold noodles and veggies or serve with rice or use as a dip for steamed veggies or roasted meat. This sauce keeps very well in the fridge for a week, tightly covered (or your fridge will smell like garlic and peanut butter and sesame oil!)

Happy Cooking and Eating!
The Beauty of Winter Veggies


Radicchio from Ayers Creek Farm (at the Hillsdale Market every other Sunday throughout the winter)


I recently wrote a gushing post about my love of winter veggies for Culinate. But one post is not enough. I haven’t been to the Hillsdale Farmers Market–one of two year-round markets in the Portland area–for 10 days or so. And I missed the other one, which is right in my neighborhood–the People’s Coop Farmers Market–last week. Both are community treasures. And I will head over to the People’s one this afternoon. My fridge, however, is still packed with baseball bat-sized leeks, dense winter squashes, beets, celery root (celeriac), and radicchio  from my last trip to Hillsdale. No matter what the weather the farmers and other  vendors are there with such a variety of produce that I am still sometimes taken aback at our luck of living in this climate. Though I try to grow kale and some greens throughout the winter with little success, it’s actually only partly the climate and just as much the skill, creativity and determination of our regional farmers that enables these beautiful crops to thrive in our wet, temperate climate.

Winter time cooking is often associated with slow-cooked soups and stews, braised meats and the like. However, it’s also possible to throw together fresh, hearty salads this time of year and they are a nice counterpoint to the richer, sweeter flavors of those stews and roasts.


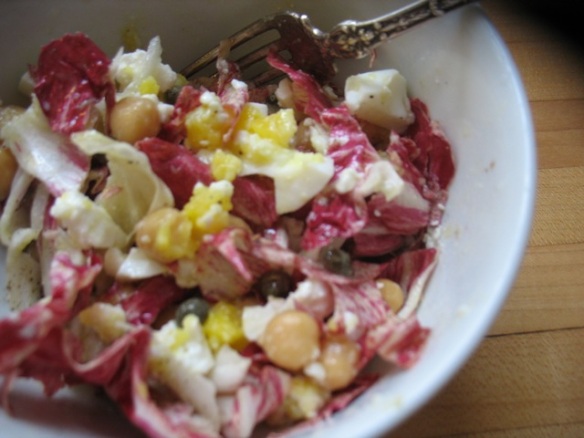
Radicchio, Chickpea, and Chopped Egg Salad


Yesterday for lunch (and for my husband’s lunch he took to work), I tossed some of this beautiful radicchio with chopped hard-boiled egg, capers, chickpeas (that I had previously cooked and frozen for just such meals) and a lively dressing of garlic, Dijon, olive oil, red wine vinegar and salt and pepper. It was robust, fresh and absolutely delicious.

Happy Cooking and Eating!
Katherine

P.S. My February classes are starting to fill so if you’re interested in the Favorites one or the Rice & Beans from around the World one, sign up online or let me know you’d like a spot. I’ve also just scheduled some lunch-time classes that are going to be loads of fun and shorter and cheaper but with a full meal as usual so check those out as well.

Food as Comfort

For some reason a lot of sad and tragic things have happened/are happening to people I love right now. And I have that deep, sorrowful feeling of helplessness. When I’m sad I actually have a hard time eating, and an even harder time mustering the energy to cook. So I’m going to get cooking for people and hope that a little warm food might help just a little with the ache of it all. I apologize for the morose post but I guess what is this blog if not personal.

So here’s a recipe for a very comforting and nourishing dish:

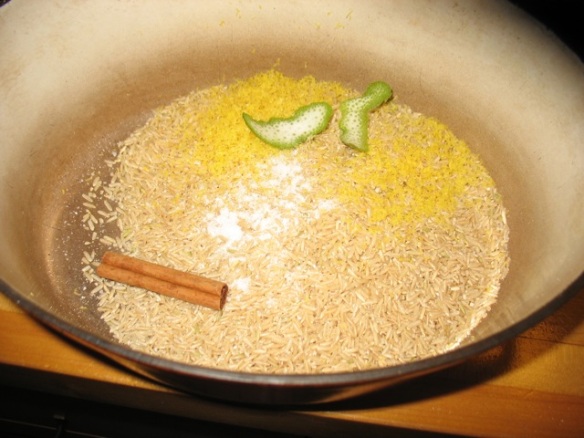
Brown rice with lime peel, lemon zest, cinnamon stick

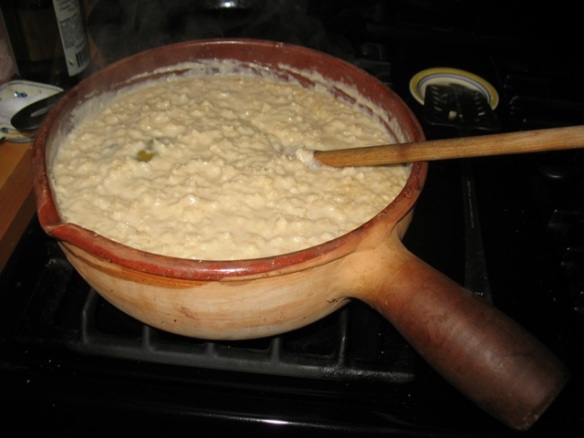
Citrus and Coconut Brown Rice Pudding

–adapted from Mark Bittman’s Food Matters

This takes a while to make but it’s almost all unattended time in the oven and it’s a treat especially in the winter. You can vary this in many ways to suit your tastes.  Mark Bittman suggests pulsing the grains of rice in a food processor a few times to break them up a bit which does result in a more luscious pudding but you can certainly skip the step.

½ cup long or medium-grain brown rice

1 14-ounce can coconut milk (I use full fat but you can use light too) and the equivalent amount of whole milk

½ cup brown sugar

1 two-inch long strip of lime peel (I use a carrot peeler to shave this off)

grated zest of half a lemon

1 small cinnamon stick and/or a 3-inch piece of vanilla bean, split and seeds scraped into mixture and pods added too

Preheat the oven to 300 degrees.

Mix all the ingredients well in a 2 or 3 quart oven-proof pot or Dutch oven. Cook uncovered for about 45 minutes then stir well. Cook for another 45 minutes and stir again. The mixture should be bubbling by now and might be getting a bit golden around the edge. Cook for another 30-45 minutes. Now it will start looking more like rice than milk. Stir every 10 minutes now. It will thicken considerably as it cools so take it out just before you think it’s the right thickness. But even if it gets really thick it will taste wonderful so don’t sweat it too much.

Remove the cinnamon stick. Serve warm, at room temperature or cold. You can add raisins or other chopped, dried or fresh fruit half way through the cooking. You can also serve it topped with toasted coconut, shaved chocolate, chopped nuts or fruit compote of some kind. It’s very good with slices oranges that you macerate in orange and lemon juice, a bit of Cointreau, and some orange zest and sugar (if you’re feeling fancy!)

This was a quadruple batch a while ago, so know that the above recipe will make much less!

Send some good vibes out in the world and cook for a friend in need!

Change

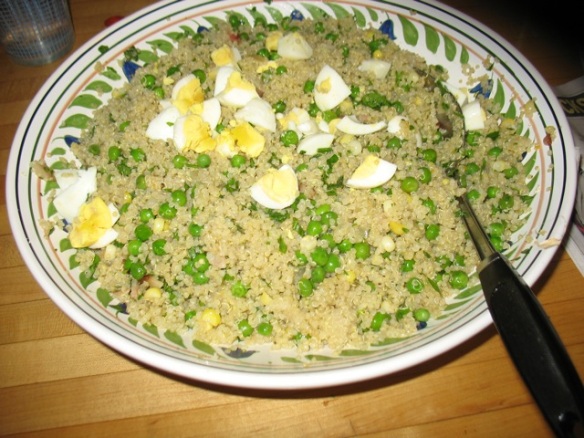
A quintessential last minute dinner: Quinoa with bacon, peas, and hardboiled egg.

I’ve been thinking about change a lot as I develop and gear up for my new cooking class series entitled Eat Better: Kitchen Fundamentals, Pantry Stocking and 30-Minute Dinners.  It seems that in the world of cooking, foods and methods of preparation have changed as our lives have changed. We’re busier, we work outside of the home for longer hours, we have other priorities. So I devise a series on how to make cooking real meals with whole ingredients possible in this kind of a world. But even 30 minutes of solid cooking in the evening plus the time it takes to keep that pantry stocked and a few things prepped here and there is a big shift for many of us.

So the question I keep asking myself is how to find that balance between offering lots of creative short-cuts and menus that fit into our busy lives and helping people want to spend a little more time in the kitchen because the pay-offs can be so, so great. So maybe having our lives change just a bit to enable real, good food to hit our table more often, means that instead of needing the cooking to be crammed into our crazy lives we decide to make our lives a little less crazy in order to fit in some real cooking.

Even though I work from home and my work is food, I still often don’t know what I’m going to make for dinner when 5:30pm rolls around. I do have a very well-stocked pantry and several decades of cooking under my belt so the task is not so daunting and often a nice break from the computer. But even with my time at home and years of experience, I chuckle when I read cookbooks  that say things in the head notes of a recipe like this: Serve this ____ main dish with ___ salad with ___ dressing and ___ vegetable dish for a simple satisfying supper. What?!  I can’t count on 2 hands the times my regular week night dinners have included the above components in the last six months. Maybe I’m unorthodox in my focus one one-dish dinners or one dish plus fried egg or one dish plus slice of bread or one-dish plus something I had in the freezer or made extra of the day before, but that is my reality and I find truly simple meals like this very satisfying. And I don’t think I’m feeding my family nutritionally unbalanced meals. This way of cooking certainly is informed by growing up in a household with three brothers and usually an exchange student or two and two parents who liked to eat. My mother just made quantities of one or two dishes and that was that. It was always delicious. And, I should add, she always made some kind of dessert because my father mandated it!:) But I digress.

What I think I’m trying to say is that real, good food can be made fairly quickly and regularly and the investment in time it takes to build that skill and confidence level is worth it.

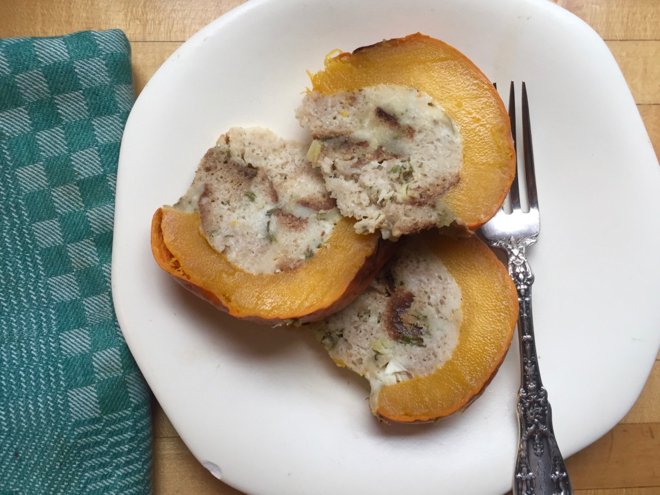
The first time Ellis actually saved me time in the kitchen. He perfectly hollowed out both halves of this squash–no stray strings or seeds! So, if you have kids, put 'em to work!:)

So I’ve tried to tackle a big subject in these few muddled paragraphs and I would love to hear your thoughts on how you find a balance between cooking and all your other interests, demands, needs, etc. And I’m curious whether you would like to spend more time cooking, less time, would like to cook differently, more simply, more creatively. . .

Happy New Year and happy cooking and thanks for reading.

Katherine

P.S. In case I haven’t mentioned it before, I’m a guest blogger at Culinate these days and if I’ve missed a blog post or two of my own lately it’s because I’ve been posting there as well and there are only so many hours in the day. . . So if you’re curious, there’s this recent one and this one. Enjoy.

Simplicity

Polenta with Greens and Beans

We’ve been to lots of holiday parties over the past two weeks. I’ve baked a lot, made some candy, and generally have been a bit out of my routine. I love the parties and this time of year in general but tonight, I just cooked a regular old dinner and it was just the three of us and Ellis went to bed on time.

It’s during times like these where the cook-with-what-you-have philosophy and capacity is especially useful. When your grocery lists focus on sweets or what you’re going to bring to Christmas dinner, being able to make a frittata with a handful of herbs and a few diced potatoes, or a bowl of polenta with greens or beans or both, is a blessing.  So instead of sending out a final cookie recipe or some glamorous holiday dinner center piece, here are a few photos and ideas of what to make when you just need a regular old meal to keep you going, happy, and healthy.

Herb and Potato Frittata

If you don’t have time for the polenta and have some cooked or canned beans on hand, just braise whatever greens you have (kale, chard, collard greens. . .) with a little crushed garlic and some salt and mix with the warmed beans. Drizzle generously with olive oil and enjoy with our without a piece of bread.

Or, dice some winter squash and/or carrots, sweet potatoes, parsnips, etc. and toss with olive oil, maybe some cumin and chili flakes and roast at high heat until tender. Fry an egg and pop it on top of those veggies and dig in.

Another favorite is to cook a few, chopped leeks in a little butter or oil. Toast big slices of bread and spread on some goat cheese or a few slices of any kind of cheese you have on hand, top with the hot leeks, drizzle with a little balsamic vinegar, add a few grinds of pepper and salt and olive oil and enjoy!

More ideas of course on the recipe page and please share your favorite quick winter meals in the comments if you’d like.

I wish you all a peaceful, delicious and convivial holiday. Thank you for reading and cooking.

Gratefully  yours,

Katherine

My mother and me with some of the Thanksgiving pies in the background

The Best Soup

I wish I managed to assemble blog posts with beautiful photos that illustrated the step-by-step process of each dish, but on second thought that’s not often how my cook-with-what-you-have nightly cooking unfolds so I might as well keep it realistic. And with a tired and hungry pre-schooler underfoot, photos often just don’t happen. So I’ll keep enjoying those beautiful blogs and offer you something else–a slightly more slap-dash account of meals I think are worthy of sharing and other stories.

best soupd with egg
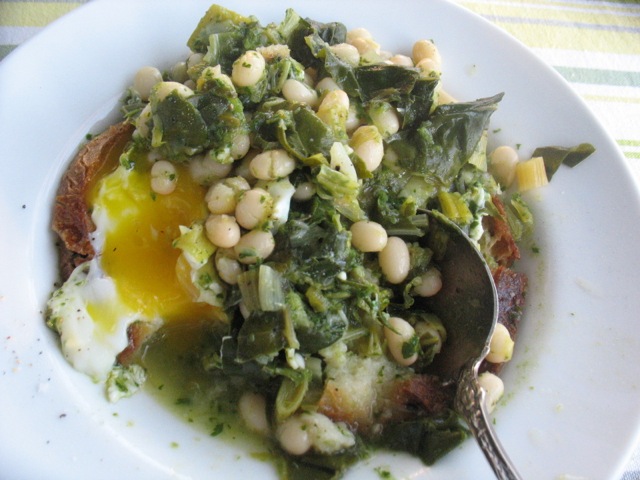
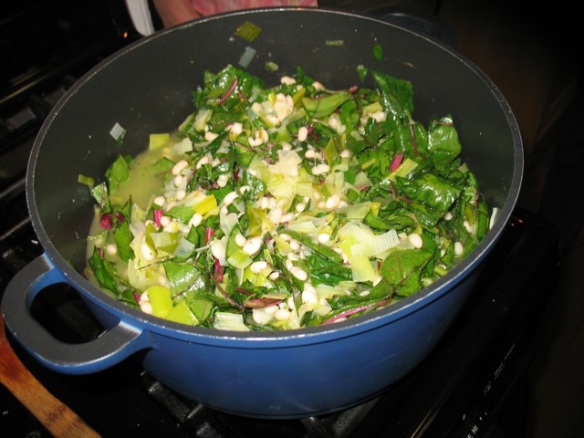
Chard, leek, white bean and cilantro soup over garlicky toast, topped with a poached egg–that you poach right in the soup.

Whether this is the best soup or not, it is my current favorite soup. It’s a slightly unusual combination of things and comes together into one of the most satisfying and complete meals, warming body and soul on these cool, stormy evenings.

It is basically stewed leeks with white beans, veggie broth, chard and pureed cilantro served over toasted bread you rub with garlic and then top with a poached egg (that you poach right in the soup). The bread and the egg take this dish to its exquisite level. However, I’ve enjoyed leftovers of this soup without bread or egg and just a generous drizzle of good olive oil, very much.

Two things that make this soup especially good are good beans and homemade veggie bouillon. The former I talked about in my last post and the latter is easy to make. As you all know I’m a bit evangelical about this veggie bouillon. I’m actually considering making it in quantity to sell so stay tuned. It has made my daily cooking easier, better, more economical and definitely more fun. You can certainly  use any stock or broth or even water and beans (dry or canned) from the store to good effect. Just make it! It’s a wonderful antidote to the sweet richness of the other foods this time of year.


Finally, my Kitchen Fundamentals, Pantry Stocking  30-Minute Dinners series is filling up quickly so if you’re considering it for yourself or as a gift, let me know asap.

Happy Cooking and Eating and Celebrating!
Katherine

Cilantro Bread Soup (Acorda)

–loosely adapted from Tea & Cookies

serves 4 (with plenty of leftovers) or 6

1 cup dried white beans (cannelini, great northern, Ayers Creek white beans of any kind, Rancho Gordo Marrow beans . . . ) or 1 14 oz. can of cannelini or other white beans

2 tbs olive oil

2-3 leeks (about 2 cups, chopped)

5 large cloves garlic

6 cups home-made veggie bouillon or veggie or chicken stock

2 cups packed cilantro

one large bunch chard, stems removed, coarsely chopped (about 4 cups)

sliced crusty bread (4 slices)

4 eggs

salt and pepper, to taste

good olive oil for drizzling

Cook the beans in water with one clove of the garlic until soft. (See bean cooking instructions here) Drain and set aside. You could also use canned beans.

Trim and clean the leeks. Cut in half, lengthwise, and slice in 1/4 inch slices.

Heat olive oil in a large pot. Sauté the leeks in olive oil until limp. Add three cloves of garlic, minced. Continue sautéing until the garlic is soft but not brown about 2 minutes, lower heat as needed. Add four cups of the stock and bring to a simmer. Add the beans and continue to simmer for a minute or two. Add the chard to the pot and cook for a few minutes. Blend the cilantro with the reserved 2 cups of bouillon in a blender. Add the cilantro mixture and season with salt and pepper. Bring mixture to a rapid simmer. Crack eggs into soup, cover and let poach about 5 minutes until the yolks and whites are just set.

While eggs are cooking toast the bread slices and rub with remaining garlic cloves. You can rub one or both sides of the toast with garlic–depending on much you love garlic. Lay the bread in the bottom of a soup bowl. Ladle the soup over. Top with poached egg. Drizzle with good olive oil and grind some pepper over the top.

Cooking Beans

Cook with what you have sounds nice but what should/would you like to have on hand? This is a fun and complex question. I’m going to tackle a small fragment of this question today. I’m going to talk about beans, white beans, and cooking them at home. A quick side note about dry beans. Here in the Portland area we are lucky to have a couple of very local sources of dried beans. Ayers Creek Farm sells their beans at the Hillsdale Farmers Market. The quality, flavor, varieties are unbeatable and worth seeking out. Sungold Farm sells pinto beans that are wonderfully sweat and creamy and are available at both the Portland Farmers Market and the Hillsdale Farmers Market. I have also had very good results with dry beans purchased from grocery stores, both bulk and packaged, so don’t let the possible lack of local beans deter you.


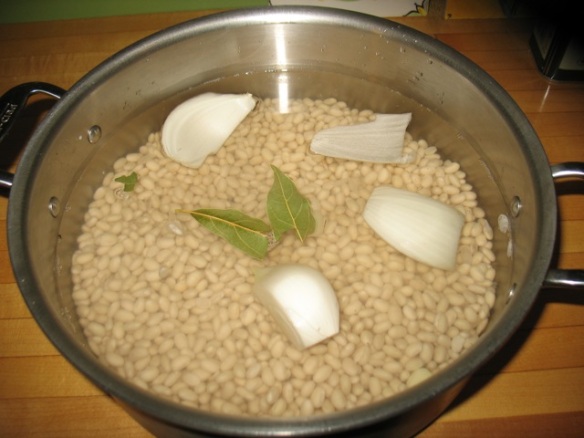
I love to cook beans. The taste is unbeatable; it’s simple to do once you’re in the habit; and if you cook large quantities at once and freeze them it’s as convenient as having canned beans on hand but with better flavor, less waste, less expense, etc. My routine, since I work from home, is to put several pounds of beans in a big bowl covered with water before I go to bed. The next morning I drain them, put them in a big pot with a couple of bay leaves, a chunk of onion and few peeled, whole garlic cloves and simmer them for 25-60 minutes depending on the bean. Small white ones like the navy beans in this picture tend to cook in about 25 minutes if they haven’t been sitting on a shelf for several years and chickpeas tend to take the longest, 45-55 minutes. When the beans are, salt them generously (like 2 teaspoons for 1 1/2 dry beans) tender turn off the heat and let the beans cool in their cooking liquid. This will even out their texture as some beans inevitable will be a little firmer than others, and improve their flavor. They will not, as counterintuitive as it may seem, disintegrate from sitting in the hot liquid.

For those of you who leave the house every day, you could put them to soak in the morning and then cook them while you’re making dinner. Once cooked, I strain them (reserving the liquid) and put them into pint and quart containers, pour the cooking liquid up to cover them (helps preserve them and it’s great liquid to keep if you’re going to make soup later on) and then freeze them. I do this with white, black and pinto beans and chickpeas regularly. Oh and on the perpetual question of when to salt the beans you’re cooking, I have long gone with the recommendation of John Willoughby from a piece in Gourmet years ago where he debunked the theory of not salting until they’re cooked. So, I salt at the beginning with great results but if you have a different method with which you are happy, by all means stick with that.

So what to do with all those “bean popsicles,” as a student of mine once called them? The frozen beans thaw quickly in a pan over high heat with a bit of water. I just thawed a pint for my lunch in about 5 minutes this way.


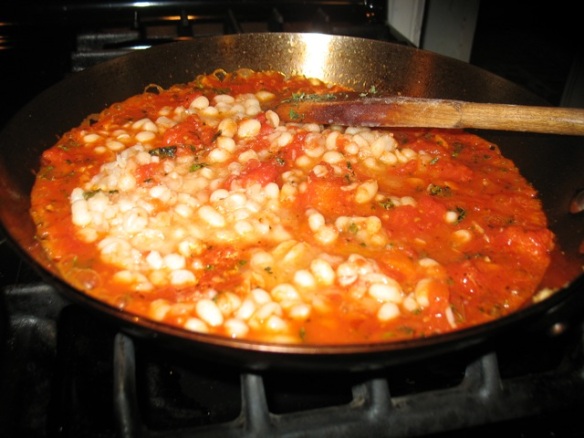
Of course if you have the presence of mind to take them out of the freezer a few hours or a day ahead of time, great. They keep well in the fridge for the better part of a week. So, for the above lunch I mashed some garlic with salt, sautéed for a minute, added a can of tomatoes, broke those up a bit, added oregano and cooked over high heat for a about five minutes. I then added the thawed beans and heated those through. Some black pepper and a little olive oil to finish and voila!  This makes a delicious light lunch or side dish mixed with pasta and maybe some sausage a hearty and quick dinner.


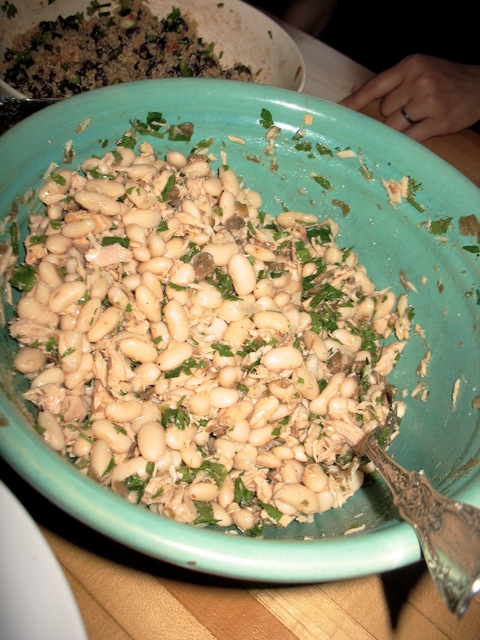
You could also toss the beans with some tuna, parsley, capers, finely chopped onion and a vinaigrette with plenty of red-wine vinegar and/or lemon juice. (For another local pitch, I love Oregon Albacore available at local grocery stores and farmers markets.) Or you could mash the beans with some lemon zest, juice, garlic, olive oil and a little rosemary or thyme and have a hearty spread. Or you could make a soup with kale, other veggies, sausage and white beans. The options really are vast.


I’d love to hear from you on this subject. Do you cook beans? What do you do with them? Have you found it easy? Too much effort? Not satisfactory? Beans too mushy or crunchy?

Happy bean cooking and thanks for reading!

P.S. I’m going to be teaching a 3-part series in January on pantry stocking and cooking quick meals similar to the ones described above in case you’re interested.

Stuffed and Roasted Pumpkin

This is the most delicious, beautiful fall dish. It’s perfect for a regular old dinner (though it does take almost 2 hours to bake so maybe a weekend dinner) or a Thanksgiving treat. But it’s so easy and so adaptable that you should add it to your regular repertoire. It’s wonderful with cooked rice instead of bread, additions of cooked spinach or chard, cooked sausage . . .

Serves 6


Pumpkin Stuffed and Roasted
–adapted from Dorie Greenspan’s Around my French Table


1 pie pumpkin, about 4 – 5 lbs (just adjust the amount of filling if your pumpkin is smaller or larger – though you don’t want to go too much larger as it takes awfully long to cook)
Salt and freshly ground pepper
1/3 lb (or slightly more) stale bread, sliced and cut into ½-inch chunks
1/3 lb cheese, such as sharp cheddar, Gruyère, Emmenthal or a combination, cut into ½ chunks or grated
2-4 garlic cloves (to taste), finely chopped
2-4 slices bacon, diced and cooked until just crisp
¼ cup chives or sliced scallions (green onions), thinly sliced
2 teaspoons fresh thyme, minced or 1 1/2 teaspoons dried
1-2 tablespoons chopped fresh parsley
½ cup of cream or half and  half
½ cup milk
¼ teaspoon freshly grated nutmeg


Preheat oven to 350F.


You can using a baking sheet, a pie pan (as seen above), or a dutch oven with a diameter that’s just a tiny bit larger than your pumpkin. If you bake the pumpkin in a casserole, it will keep its shape, but might stick to the casserole, so you’ll have to serve it from the pot which is fine too.


Using a sturdy knife, cut a cap out of the top of the pumpkin. Cut a big enough cap that it’s easy to hollow out the inside. Scrape out the seeds and strings from the cap and the inside of the pumpkin. Rub the inside of the pumpkin generously with salt and pepper and put it on the baking sheet, pie pan or in a pot.


In a large bowl toss the bread, cheese, garlic, bacon, and herbs together. Season with pepper and salt and pack the filling into the cavity. The pumpkin should be well filled—you might have a little too much filling, or you might  need to add to it. Stir the cream, milk and nutmeg with a bit of salt and pepper and pour it into the filled pumpkin. You want the liquid to come about half-way up the cavity. It’s hard to go wrong though. Better a little wetter than too dry.


Put the cap in place and bake the pumpkin for about 2 hours—check after 90 minutes—or until everything inside the pumpkin is bubbling and the flesh of the pumpkin is easily pierced with the tip of a knife. Remove the cap for the last 20  minutes or so of baking to brown the top and let any extra liquid evaporate. Transfer carefully to a serving platter if you baked it on a sheet. Serve, scooping out plenty of pumpkin with each serving or serve it in slices.


Pie

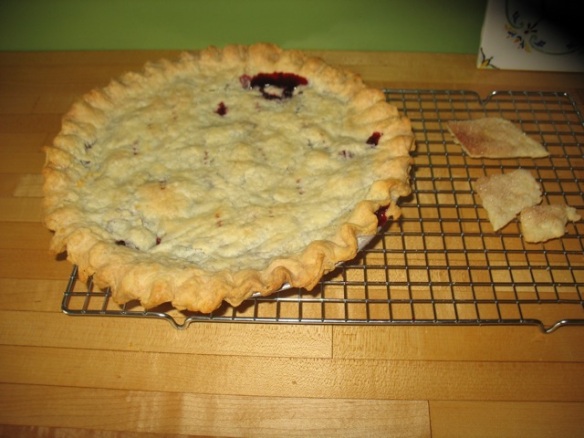
Blackberry Pie and Pie-crust Cookies

I’m teaching a pie class (sweet and savory) this Sunday, November 14. I am a bit evangelical about pie. I love to bake most anything but there is something about pie that appeals to the minimalist in me. Just flour, butter and water for that crust and apples, a little sugar and thickener for the filling and the sum of those few things is just so much more than you’d expect. But there are a few tricks to pie and we’re going to tackle that all-butter pie crust and crimping those edges (that inevitably do sag in places when baked thanks to all that delicious butter!) and getting the filling cooked just right.  We’re going to fill those crusts with apples, pumpkin, and Swiss Chard and eat our results.

And for all that hard work we’re going to be rewarded with eggnog–my grandfather’s recipe with bourbon, rum and nutmeg–and of course eggs, cream and milk–completely unrelated to the stuff in cartons at the store.

Swiss Chard Tart

My family (extended) has a thing about pies. At Thanksgiving, ever since I can remember, we’ve had a pie-eating contest. Slightly vulgar, I admit, but oh so fun and delicious unless you over do it and then you need a serious recovery period. Here’s a photo from last year’s pie (and tarts and cake) line-up sans my mother’s pumpkin chiffon and chocolate pies which were probably still in the fridge. Not a very good photo but I guess I wasn’t thinking about blog-worthy photos in the moment.  I should add that the contest is not highly competitive and is informally held over many hours and tiny slivers (especially of rich things like pecan pie) count. There’s a lot more talk than actual keeping track. And since my aunt Jane (or her daughter Martha) almost always win it’s not much of a nail-biter.

From l to r, Chocolate Tart, Pumpkin Bourbon Tart; Chocolate Guinness Cake, Brandied Dried Fruit Tart, Blackberry Pie, Apple Pie, Pecan Pie, Mince Pie

The sum total was 11 pies and tarts last year and we probably had 18 people for Thanksgiving. That is an obscene ratio! However, we all get to have pie for breakfast and lunch the following day and everyone gets to go home with a quarter of this and a few slices of that. And contrary to some opinions, misshapen, slightly soggy and less than perfect looking slices of pie are just as tasty or more so, than those pristine ones on day one!

As you can see, Thanksgiving is not strictly limited to pie. My sister-in-law and one of my cousins and I always bring some other tart or cake we just have to try. Some of us read the same cooking magazines/blog and occasionally end up bringing the same new idea–a dense chocolate hazelnut tart one year and a pumpkin cheese cake another. My mother and my aunt Jane have their standards and there would be mutiny if any of those were missing. For Jane that’s lofty apple pies and dense, gooey pecan; for my mother it’s those pumpkin chiffon pies and chocolate pies with lots of whipped cream. Actually all the pies are served with lots of whipped cream–probably thanks to the heavy German influence of the bunch. I tend to contribute a traditional pumpkin pie, a mince pie (my favorite recipe is from the Grand Central Baking book), and apple pie or something like a pear frangipane tart.

Speaking of not-so-beautiful: Rhubarb Pie never sets up well but is so good. It's much better to have a delicious pie than a beautiful pie, though the combination is unbeatable!

So whether you can make it to class on Sunday or not, give pie a try if you’ve been hesitant and let me know how it goes. And if you have questions or want tips or have tips to share from your pie-baking adventures, leave a comment here.

Happy baking!

Inspired by Mark Bittman

I got to hear, speak to and shake Mark Bittman’s hand yesterday. He spoke at Powell’s Books in Portland. He’s written many wonderful cookbooks and writes the weekly Minimalist Column in the New York Times. He has a new cookbook out but spent very little time talking about the book. What he did talk about (and why many of us might want to get the book) is the pure and simple need for more people to cook more often; for all of us to eat more plants and less processed junk and fewer animal products. The wonderful thing about Mark is that he’s not preaching any particular diet. What he is preaching is that in order to keep our good, green earth alive and green and good and able to sustain its inhabitants we need to do things differently.

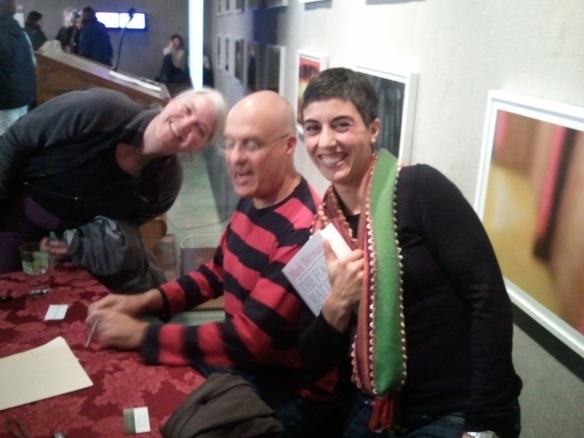
Me (on the right) with fellow Food Blogger Kathleen Bauer and Mark Bittman. Could I have a bigger grin on my face?!

Many of us may already be doing what he advocates but he calls all of us to action nevertheless because caring for our own families is great and critical but not enough. I won’t recount all of the statistics he presented last night be let’s just say that a very small percentage of meals consumed in America are made from scratch and include unprocessed vegetables and that a great many people (children included!) are getting very sick from processed foods and our planet is paying an equivalent price. He also makes a very clear point on the role of government in food. He says that government is subsidizing corporations and should be subsidizing us, people! So he calls for a mass movement of folks to talk about subsidizing good food in school, vegetables, fruits. . .. instead of soy and corn and pesticides and fertilizers. And when the resources go to people rather than industrial food, well then maybe organic vegetables or just good, fresh vegetables and fruits will be readily available in all neighborhoods and for all kinds of folks, not just those with easy access to farmers’ markets, well-stocked grocery stores and a bit more cash. And then there’s a huge need to teach people what do with all the wonderful, fresh food. . . .

Now how is this inspiring? Well that latter part is where I come in and where we might all come in. There is such a need for better access to good food, better food in schools, better skills in the kitchen. And talking about food, while the statistics are depressing and horrifying, can and often is really fun, unifying and community-building. We all have to eat, most of us like to do so, and we all have our favorite memories, stories, flavors, associations. So I’m inspired to use these statistics to focus on all the good stuff we can be doing with food and with our families and how to make this even more part of our regular, daily lives. And I’m inspired to do more work on the political front to help shift the way our tax dollars are spent. And I’m inspired because Mark Bittman articulated in 45 minutes what Slow Food USA (of which I am a board member) has just spent 8-months articulating in the form of our strategic plan. When I said this to him he said: “It’s taken me 20 years!” So it’s nice to know that someone of his stature and influence is on the same path and that we, Slow Food, and many other local and national organizations, have a huge role to play in helping people find ways to improve our food system, our health, our planet.

Thanks for reading and happy cooking!

Keeping Up With All the Produce

My son was sick for more than a week, I’m completely behind on my work, and it’s GORGEOUS outside (built little hoop houses for my winter greens this weekend instead of catching up on inside work). All of this means that the fruit and vegetables, already abundant this time of year, are overwhelming my small refrigerator, counter, fruit bowl, etc. The fruit flies are feasting and time is a wasting on all this beautiful stuff. So I just did a whirlwind catch up job on some of it:

Roasted peppers

Roasted Tomatoes

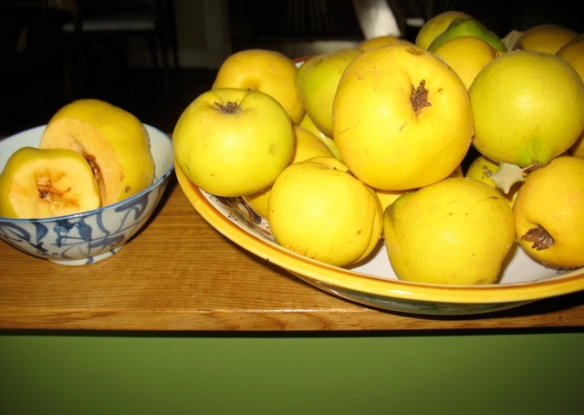
Cut the rotten parts out of a few quince and am plotting what to do with them all. Compote, paste, apple/quince crisp, jam. . . .

And alas, threw away some rotting lettuce.

I think tonight’s dinner will be a frittata with some of the roasted peppers or a Savory Bread Pudding with some of the peppers and roasted tomatoes and the rest of the basil I just salvaged from the garden.

I feel a bit better about the state of my fridge and counters and am ready for tomorrow’s CSA and all the shopping I’ll be doing for this weekend’s classes. And I do love this season and the bounty and beauty of it, but I won’t pretend that it’s not a lot of work. I enjoy the work and like the creativity of figuring out what to with it all. If I didn’t work at home though, and have a job (have given myself a job:) that involved food, I wouldn’t be able to manage all of it and still have fun with it. I also know it’s a privilege as well as a choice. I’ve been musing about this a lot lately and will devote more time to it in the future, but in the meantime, I wish you the time to preserve and use this bounty if you’re so  inclined. And I’m happy to share my techniques and ideas if you’re interested. And I’d love to know what you’re doing with the odds and ends in your kitchen, whether it’s just tonight’s dinner or some favorite way of preserving.

Happy cooking and eating!


The Last of the Corn, Peppers. . .

We are having a beautiful fall here in Oregon. Days are sunny and warm, evenings and mornings cool and sometimes foggy and all those dreaded green tomatoes have (or will!) turn red. The peppers are glorious and abundant in every color, size and shape. And while I’ve mostly shifted to late fall/winter vegetables for my classes (still spots left in Soup Class on 10/24!) I am still clinging to the summer ones for the duration of their existence this year for my home cooking

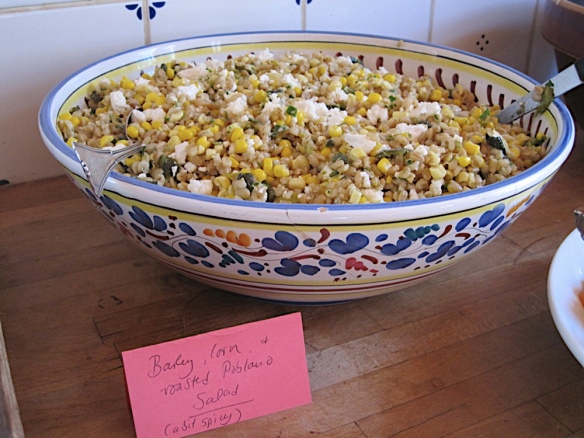
I first made this salad almost a month ago as part of the dinner I catered for a forestry conference my mother hosted. It was well received and prompted my brother (the one who recently got married) to tell me that he wished I would have catered his whole wedding. I say this in part because I was thrilled to finally have created a barley salad worth writing about unlike this attempt you might remember.

So if like me, you’re trying to get the most of late summer treats like corn and peppers give this a try and let me know what you think. And I just might try a winter version of this hearty dish when I fully embrace the colder seasons.

Corn, Barley, and Roasted Pepper Salad

1  cup pearled or *hulled barley or about 3-4 cups cooked

3-4 ears of corn, kernels cut off cob

2-3 **poblano peppers or sweet Italian red peppers or really any kind or combination of sweet or mildly spicy peppers

3 oz of feta, crumbled

Dressing:

3 tablespoons lime or  lemon juice

2 teaspoons ground cumin

2 cloves of garlic minced

salt, pepper

3-4 tablespoons olive oil

1/2 bunch parsley or cilantro, roughly chopped (optional)

*Note: I used hulled barley which, unlike pearled barley, has only had the outer layer removed and the bran layer is still intact. It’s delicious and full of good fiber but does take a little longer to cook so depending on what kind you’re using adjust your cooking time. ** Poblano peppers vary widely in their level of heat/spiciness. Taste them as you go and you may not want to use as many as I suggest if they’re really spicy. Final note, if you’re using sweet peppers and are in a hurry you can skip the roasting step and just dice them. The roasting adds a wonderful smoky richness but the salad is still good with fresh peppers.

If you’re using hulled barley add it and 4 cups of water  to a pan with 1 tsp kosher salt. If you’re using pearled barley, add only 3 cups of water. Bring to a boil then turn down to a simmer and cook for about one hour for hulled and 45 minutes for pearled. Test to check for doneness. You want it to be soft but with a bit of a bite still, not mushy. It’s pretty forgiving though and firms up a bit as it cools so don’t worry too much. Remove from heat and put in a large bowl to cool.

Meanwhile roast the peppers under the broiler or directly on your gas flame until blackened and blistered on all sides. Set in a bowl and cover for a a few minutes to cool and loosen the skin. When you’re able to handle them remove the skin, stem and seeds and roughly chop.

Cook the corn kernels with a splash of water and several pinches of salt until just tender, about 5 minutes.

Mix all the dressing ingredients. Add corn, peppers, cilantro or parsley (if using) and dressing to barley and mix well. Then add the feta.  Add salt, lemon juice or cumin to taste. The barley soaks up a lot of salt and acidity.

Note: It’s easy to cook barley in larger quantities ahead of time and freeze for  super quick meals like these.

What a Wedding!
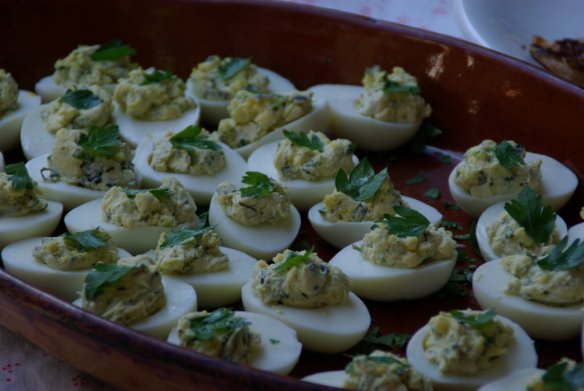
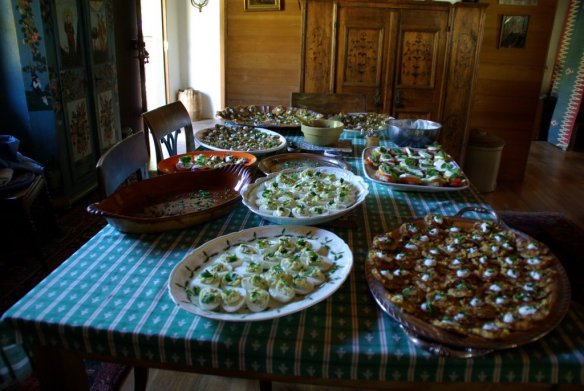
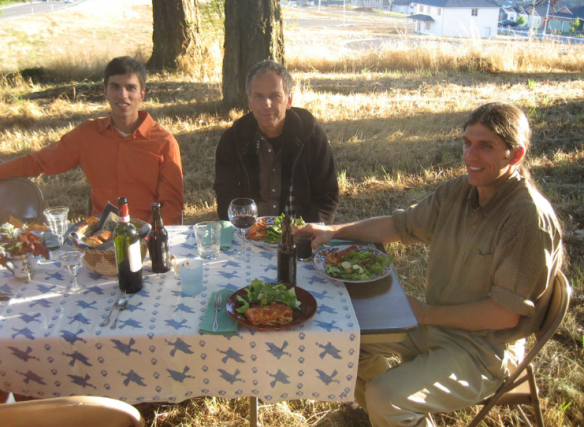
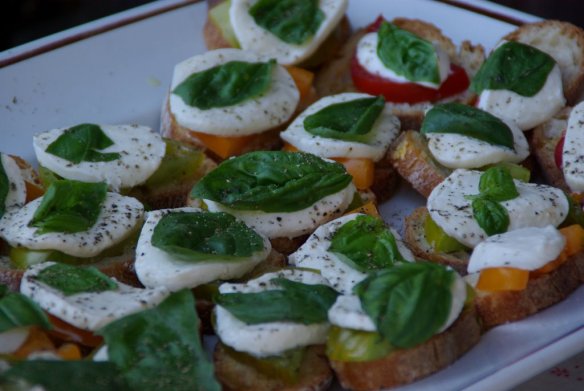
250 corn cakes, 150 “caprese” toasts, and 160 deviled eggs! Done, consumed, enjoyed and almost forgotten. I have not, however, and never will forget the spirit and beauty of the day. You can get a sense of it here and I’ll post more photos as I get them. My brother has always been good at throwing parties and he (and Emily!) outdid themselves this time. They managed to organize four days of celebration beginning with cider pressing on Thursday followed by a totally impromptu “cook with what you have dinner” for 20 by yours truly and my mother. Then we had a day of set up, rehearsal and rehearsal dinner on a beautiful evening. The only hitch was that the lasagnas were still solidly frozen 4 hours before dinner and I was afraid they were going to turn from block of ice to mush in those four hours they spent in the oven. Somehow they managed to survive.

Ben (the groom), uncle Hans (from Germany), brother Reuben

The wedding day dawned foggy with a pink sunrise that just barely permeated the fog to lend a warm glow to the quiet morning. We all scurried about hauling straw bails (supports for the last couple of benches for the ceremony site), setting tables, arranging flowers, and in my case frying corn cakes. That was the longest slog on the food prep front–frying 250 of those little buggers in two 9-inch cast iron pans for 90 minutes straight. I had had lots of  help with the deviled eggs the day before and new helpers arrived Saturday morning to assemble the appetizers. Thank you Susan, Bridget and Vita!

Corncakes with cumin lime Greek yogurt and parsley

Deviled eggs with homemade mayonnaise and lots of herbs

"Caprese" toasts

In the middle of the appetizer prep and the bride getting ready with her bridesmaids and about an hour before picture time, the power inexplicably went off. I panicked, just a bit. No power means no water at my mom’s place (where all this was happening) since water arrives in the faucets via a pump that is powered by electricity. My brother Ben calmly looked at me and assured me all would be fine. My other brother Reuben started calling neighbors to see if this was an isolated problem or general problem (turned out to be a general problem). Some groomsmen and Reuben retrieved the generator from the barn and hauled it down to the wedding site to ensure proper amplification during the ceremony. My mother hastily taped notes with “do not run water” on all the faucets and toilets and my helpers and I continued toasting our hundreds of slices of baguette in the old propane oven in the kitchen. The lamb and pig were both happily roasting up at the barns without any need for electricity and I realized Ben was right. Everything would be just fine!

Then just as photos were wrapping up and we started to line up for the real deal the power came back on. So no need for that loud generator after all and I could rid my hands of the greasy, bacony corncake smell just in time.

To make what could be a record-breaking long blog post shorter, the ceremony was beautiful, funny, moving and everything it could have been. The highlight of the dinner was the pulled pork that had been roasted overnight in a pit underground resting on the apple trimmings from the previous day’s cider pressing.

Ryan, the expert pig roaster (and wedding officiator) and I preparing to "pull" that juicy amazing meat off the bones

The dinner was followed by 45 minutes of moving and funny toasts and stories about the couple, amazing mini-bundt cakes made by Emily’s sister and then there was dancing, until 2 am!

And now back to those corncakes. They  make a wonderful dinner and are a good way to take advantage of some of the last of the season’s corn. And by all means make them regular pancake size, not silver-dollar-sized!

Corncakes

4-5 ears fresh, sweet corn, kernels cut off cob

1 oz bacon, diced

1/2 medium onion, finely diced

1 poblano or anaheim chili, roasted, peeled, seeded and chopped (optional)

1/2- 1 tsp. ground cumin

salt & pepper

2 eggs

1/3 cup flour

1/3 cup cornstarch

1/2 – 3/4 cup water

Saute the bacon and onion in  large saute pan for about five minutes until the onion is soft. Add the cumin, salt, pepper, roasted chili if using, and corn kernels. Cook for about five minutes then take off the heat. In a large bowl, beat the eggs, add flour, cornstarch another pinch or two of salt and water and whisk until smooth. Start with 1/2 cup of water. Add the corn mixture and mix well. If the mixture seems too thick and sticky add a few tablespoons of water at a time. Heat another frying pan with a little oil (just to coat the bottom–these are pan-fried not deep-fried) and spoon the batter into the pan. Flatten the cakes a bit and fry until golden brown on both sides. Just a few minutes on each side.

Serve with greek yogurt mixed with more cumin and some lime or lemon juice, to taste.

Finally, three orders of business. First of all, most of the fall classes I’ve posted are almost full or sold out. I do have a few spots in this coming Sunday’s Soup Class #1 (since yesterday’s was overbooked) so let me know right away if you’re interested.

Secondly, I will be doing the chef demo at the Portland Farmers Market this Saturday  at 10 am. Come say hello and have a snack and shop the fabulous bounty of the market.

Finally, one of my favorite cookbook authors, Dorie Greenspan, is going to be in town on October 19th and will be speaking at the Heathman about her new book Around my French Table. And there will be free appetizers to boot. 5:30, 10/19 co-hosted by Powells Books and The Heathman.

Thanks for reading, if you made it this far!:)

Quick Favorites

I work at home which means I eat lunch at home almost every day. I very much like my quiet lunches on the days Ellis is in school. And recently, I’ve been incorporating tomatoes in all of them. This time of year is so wonderful because with a decently stocked pantry you can make so many wonderful things with tomatoes in a matter of minutes.  The above lunch was an impromptu fried egg, tomato, basil and soft cheese sandwich. The bread is toasted, the egg warm–which gives the basil even more fragrance–and the whole thing is gooey, messy and so satisfying.

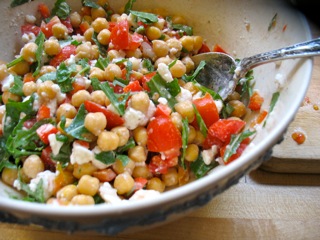
I tend to have frozen chickpeas on hand. I cook them (and black beans, etc.) in big batches and then freeze them in a bit of cooking liquid in quart or pint  containers.  Every other week or so I put a container in the fridge to use as needed. The other day I mixed said chickpeas with diced tomato, arugula, feta, olive oil, a little red wine vinegar and salt and pepper. And I had myself a delicious and hearty salad.

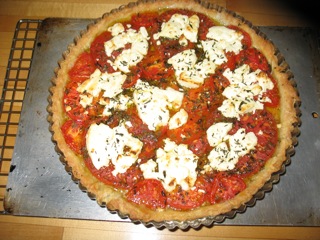
And finally, I  made this tomato and goat  cheese tart from David Lebovitz’s wonderful collection of recipes for a recent brunch with friends. It was quick because I had pre-made tart dough in the fridge. The dough itself is quick and easy to make and this recipe doesn’t even mention letting it chill before using so if you’ve got company for lunch  or dinner or brunch, it’s a winner and far easier than it looks.

Finally, two photos just for fun. This is my yellow crookneck squash plant on overdrive even as most of its leaves have already succumbed to the powdery mildew of all summer squash plants at this time of year.

And my dear brother Ben who is getting married on Saturday! I can’t wait!

Last but not least, I am having a great time testing soups but a very difficult time narrowing down  which ones to choose for the upcoming Soup Class on Sunday, October 3rd. A few spots left in that one and the Savory Condiment one in which we’ll be making tomato and onion jam and preserving sweet red peppers. Let me know if you’re interested.

Happy cooking and eating!
Katherine

Crepes

There's hope!

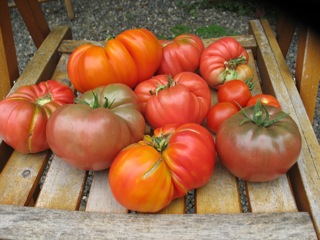
This photo has little to do with today’s post but I did want to share it to give hope to my fellow Portland-area gardeners. My tomatoes are really ripening and delicious!

So, I eat too quickly. I have ever since I can remember. I’m not sure whether it’s because I grew up in a large family and there was always a rush to get seconds before it was all gone or not. As you well know my mother is a good cook which meant we–us children, my father and whatever exchange student or visitor was at the table–always wanted more. I’d like to think I’ve slowed down a little bit over the years but it is something I really have to work on. I don’t like inhaling my dinner yet I often do, lately maybe even more now having a young child since meals aren’t quite as peaceful as they once were.

As involved as I am in Slow Food (even though we are NOT about cooking or eating slowly!) you’d think I’d ease up a bit and appreciate and savor meals more. The other problem with dinner is that by the time we sit down to eat, I’m already half full. I taste the food I make as I prepare it and I emphasize this almost more than anything else in the classes I teach. So with all that tasting and with my usually being really hungry by the time I’m putting dinner together, I taste a little more generously than I would need to.  Now it might follow that since I’m half-full already I would really not need to eat quickly when we actually sit down, but alas, this is not a rational issue. It’s funny how irrational I (we all?) can be about our food preferences, habits, quirks. . .. A topic maybe for another post.

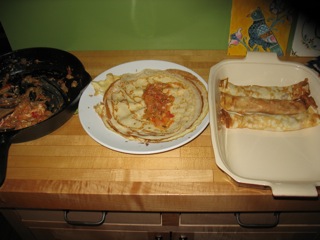
Crepes sprinkled with cheese and a little cream about to go in the oven

In any case, a dinner I made last week inspired this confession. It was one of those truly last-minute what-do-I make-for-dinner? evenings. I looked around the fridge and the garden and came up with crepes filled with a mix of lots of onions, a few diced tomatoes and generous sprinkling of thyme that I stewed together for about 15 minutes. I didn’t taste the filling very often but the crepes were the problem. You know the first crepe always falls apart and another was just too thin to hold up, so hungry as I was at 6pm, I ate both of those mishaps flavored with the tomato bits clinging to the side of the stewed veggie pan.

I filled the rest of the crepes with the onions and tomatoes, sprinkled each with a bit of Asiago Stella (my regular aged, grating cheese I use instead of Parmesan–much cheaper and very tasty and similar enough to fool some folks–and available at Pastaworks and City Market). I packed them in a casserole dish, sprinkled the whole thing with more cheese and drizzled on about 3 tablespoons of heavy cream and baked the whole thing for about 20 minutes until heated through and the cheese was melted and bubbling. It was a really good dinner! Despite all my snacking I managed to enjoy it and the green salad we had on the side very  much and may even repeat it.

That’s the funny thing about this cook-with-what-you-have method. I find myself inventing things that sometimes turn out really well but then I rarely repeat them. The blog is a good tool for cataloging these though and in choosing to share it with you all I will also remind  myself to repeat and adapt this as the months go by. I’m thinking that they would be equally good with a mix of winter squash and leeks (one of my favorite fall/winter veggies combos); or caramelized onions and sausage; or sweet versions with stewed apples and/or plums with a bit of ginger and cinnamon. . . .you get the drift.  Oh and I did make enough crepe batter so that we had the leftover crepes for breakfast with greek yogurt and strawberry jam. So I got two meals in one this time.

I don’t think you need a recipe for the filling, just remember to taste for salt add more herbs or a little lemon juice or balsamic vinegar if it’s bland. But here’s my crepe recipe. This will make about 15-18, 8-9 inch crepes.

Crepes

4 eggs

3 cups whole milk (2% works in a pinch)

1 1/3 – 1 1/2 cups all-purpose flour

5 tablespoons melted butter

pinch of salt

Put all ingredients in a blender and blend for about 15 seconds, scrape down the sides of the blender and blend again briefly until smooth. Let sit on the counter for half an hour (or in the fridge for longer and up to a day or so) if you have the time, otherwise, start cooking. I use a non-stick crepe pan but a well seasoned cast iron pan works well and you get more of a fore-arm workout:) like my mother! For the first crepe I add a little bit of oil or butter but after that it never needs any (especially with the non-stick) since it has butter in the batter. Ladle in about 1/3 cup of batter and lift the pan off the heat and rotate and jiggle the pan until the batter more-or-less evenly coats the surface. Cook briefly on both sides until golden around the edge and in spots. Stack them on a plate (and don’t bother separating them with wax paper or some such if you’re not going to use them immediately). I’ve never had a problem getting them apart again.

Fill the crepes, sprinkle with cheese and drizzle with cream and bake at 400 degrees, if you’re in a hurry as I usually am, for about 20 minutes or until bubbly and heated through.

Happy cooking and (slow) eating!
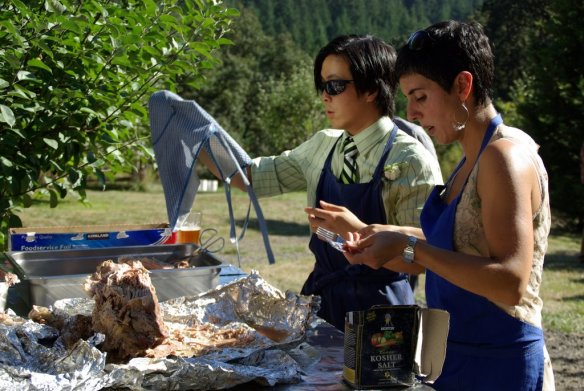
P.S. I may not blog for the next 10 days or so but will resurface after my brother’s wedding. I did just buy 7-dozen eggs, that’s 84 eggs, which will be turned into deviled eggs next week. Photos will be taken and posted . . . .

Wedding Cake

Vanilla Velvet Cake with Strawberry Curd and Strawberry-Kirsch Buttercream

More than three months after the wedding for which I made the above cake, I am finally going to share some photos and stories. Now, as I gear up for my brother’s wedding it’s fun to reflect back on the last wedding in which I played a small culinary part.

I had never before made a wedding cake. And I didn’t hesitate for long when Margo asked if I would make hers. She’s a very good friend, the wedding was not going to be huge and I had plenty of time to test, learn, fail, test again. . . .The wedding, however, was going to be populated by foodie/wine types with sophisticated palates so the pressure was on. In hindsight, the pressure was all entirely and needlessly self-induced and Margo never contributed to it whatsoever. The guidance she gave me was that the cake be centered around strawberries since the wedding was going to be in late June in Oregon. Fair enough!

Margo, Me, the cake, and Ian

I’ve made strawberry rhubarb pie; roasted strawberry and balsamic tart; strawberry ice cream; strawberry shortcake; and strawberry jam, but I did not realize at the outset of this project how challenging it is to get a true, strong strawberry flavor into a layered cake. Luckily the Cake Bible came to my rescue on this matter. The best way to accomplish this strong, fresh strawberry flavor is to pick the best berries you can find–not an easy task during this cold, water-logged spring–freeze them whole, then thaw them (this helps break down the membrane), then strain them, then reduce that juice significantly and finally mix with the blended pulp, a little lemon juice and touch of sugar. And voila! you have a super concentrated puree. I substituted this puree for the lemon juice in a classic lemon curd recipe to make the cake filling. It was delicious! I had tried both stabilizing the plain puree with gelatin and mixing it with whipped cream but neither of those fillings held up well enough with the size and weight of the cake layers and would not have cut or transported well.

Thawing Strawberries
Strawberry Puree

My next challenge was cake flour. I tested cake after cake made with cake flour–the hyper-processed, bleached , soft white flour that gives typical wedding cakes and other special occasion cakes that signature fine crumb. However signature it is, it often reminds me of grocery store sheet cakes. My test cakes tasted sort-of fake and like the smell of the plastic trays they come on. Then came the color. I wanted a really pale, almost white cake to create a nice contrast to the strawberry curd filling and buttercream and, however, tasty some of the cakes I tested were, they were too yellow. After testing half-a-dozen base cakes, I landed back on the first one, Grand Central Bakery’s Vanilla Velvet Cake. It uses just egg whites and all-purpose flour and holds up very well, both in structure and flavor.

My dear pastry-chef-friend Ellen not only lent me her cake pans and ideas (the strawberry curd was her idea) but her sophisticated palate and showed up with her husband–an excellent eater and critic in his own right–on a regular basis for taste tests.

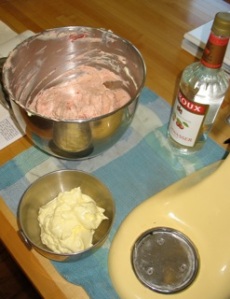
The buttercream was actually the least complicated part of the cake. The Cake Bible once again had the answer in Neoclassic Buttercream that I also flavored with the strawberry puree and just a touch of Kirsch. The puree lent the buttercream a wonderfully marbled, reddish-pink hue and the Kirsch cut the richness just a bit. I’d make another wedding cake just to have an excuse to test and eat that much buttercream.

Strawberry/Kirsch Buttercream

The trickiest part of the whole wedding cake project I think typically is baking perfectly flat cake layers. The instant give-away of the cake made by the novice is the sloping, slanted look noticeable even with the slightest asymmetry.  The Cake Bible has elaborate tables with equations for  avoiding such slanting affairs. It all has to do with the leavening and how to decrease it in proportion to the other ingredients as the cake layers get bigger. I was careful and followed her instructions–by far the most complicated math I’ve found myself doing in my adult life. I weighed the batter for each pan precisely and ended up with very even layers.

I also had done lots of research on the assembly and how best to support the layers: dowels, drinking straws, etc. I had purchased my cardboard cake circles at the Decorette Shop as well as an off-set spatula (the most important tool of all) where I had seen all sorts of crazy things I didn’t know existed including shelf-stable strawberry cake filling in a plastic bag. I did not ditch my strawberry curd plans for said, bright red filling. . . .And I happened to have a beautiful red glass cake plate from my grandmother that just fit the cake so I was able to avoid the foil-wrapped board.

I filled, frosted and assembled the cake the day before the wedding in a house all to myself. Ellis was at my mother’s and Brian was off watching a World Cup Soccer game and I cranked up the music (Bruce Springsteen I think) and went to work.

Assembly!

All the research and prep paid off. Everything worked and at the last-minute I remembered a trick I had seen on one of my favorite baking blogs to create a marbled effect with the buttercream. I left a bit of buttercream plain and gently mixed in some of the strawberry puree in the pastry bag and used that to pipe on my borders. Finally I decided against the flowers the wedding florist had set aside for the cake and went to my back yard and picked real strawberries with their stems and leaves and used those for the final touch.

Marbled Buttercream
Voila!

To make a now very long story a bit shorter, the trip to the location of the wedding (actually two trips since the restaurant sent us back home with the cake as they supposedly didn’t have anywhere to keep it for the few hours until the wedding!) was by far the most stressful part. But the buttercream held up despite the warm weather, the bride and groom loved it and we had plenty to go around.

And yes, I would make another wedding cake but again only for someone I know and love. I will not be going into the wedding cake business. The Cook With What You Have philosophy is a bit at odds with all those structural and visual needs of a wedding cake!

Ratatouille

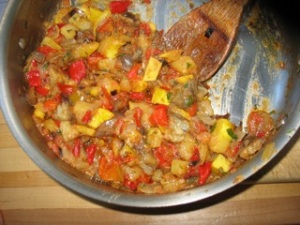
This is not the correct ratio of ingredients for ratatouille but I was in such a rush to make the dish that I did not take any photos beforehand and this is all I had on hand this morning.

I had no particular intention of writing about ratatouille but I returned from the farmers market last Saturday around 12:30 (sleepy child on the bike) with a single-minded focus on ratatouille. I postponed the nap routine long enough to get the peppers and onions sauteing in one pan and the eggplant in another. I chopped the zucchini and left my husband with instructions to finish the eggplant and start the squash while I did the nap routine. Ellis went to sleep easily and I had that ratatouille done in another 20 minutes or so!

My husband and I sat down with a glass of red wine and our ratatouille at 1:15 on the sunny porch. I probably hadn’t eaten this dish since last October and was just overcome by the perfection of it, as I am every year.  For about two months every summer/fall all the ingredients for this classic french vegetable dish are available and even abundant. And the combination of flavors and textures is just unbeatable.

I won’t even attempt any claim of authentic preparation since I think it’s one of those dishes that has as many versions as cooks making it, but I am a believer in my technique and will encourage you to give it a try. It may seem like a lot of steps but it really comes together quickly and just entails a bit of chopping, none of which has to be terribly precise for this dish. And it’s even better the next day and is always best at room temperature. I, however, did not take the time to wait for that on Saturday . . . .

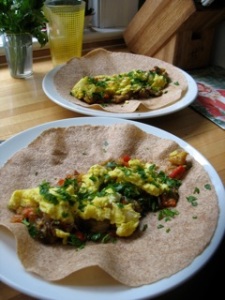
The next morning, having no bread in the house, I decided to make Ratatouille Breakfast Burritos. I scrambled a few eggs, chopped a bunch of parsley and grated a bit of cheese (feta would have been good too I think) and rolled the whole thing up in a whole-wheat tortilla. They were unbelievably good!

Ratatouille

Quantities listed here are just guidelines so use what you have but you want to have more or less equal amounts of zucchini, eggplant, onion, and pepper, a bit less tomato and just a sprinkling of herbs and garlic at the end.

3 sweet red peppers (or 6-7 skinny Jimmy Nardello peppers–pictured above, now available in the Portland area farmers markets), cut into about 1 inch chunks

1 small-medium white or yellow onion or Walla Walla Sweet, cut into 1/2 dice

1 medium-large (or several small) eggplants, cut into  1/2 inch dice

2 medium zucchini or other summer squash such as patty pan or yellow crookneck, cut into slices or 1/2 inch dice

2 medium tomatoes, diced

2 cloves garlic, minced

10 or so leaves of basil or  tablespoon of fresh oregano (or a combination), finely chopped

salt

olive oil

Heat 1 tablespoon or so of olive oil (don’t skimp on the oil in this dish!) each in two large saute pans over high heat. Add the onions and peppers to one of the pans. Sprinkle generously with salt. Add the eggplant to the other and do the same. Stir well to coat veggies with a little oil. Continue cooking over fairly high heat, stirring occasionally. You want to soften the vegetables and browning them a little is fine. Turn down to med-high and continue cooking until they’re soft. Turn off the peppers and onions but leave in the pan. Remove eggplant and set aside on a plate, add another tablespoon of olive oil to that pan and add zucchini, salt well and cook, stirring frequently until they’re soft. Add eggplant, zucchini and diced tomato to the onions and peppers. Over high heat bring it to a boil–the tomatoes will give off a bit of liquid–reduce to medium-high and cook for about 5-7 minutes until much of the liquid from the tomatoes has been cooked off. Add the garlic and herbs, cook for about 2 more minutes. Turn off heat, adjust for salt, drizzle generously with good extra virgin olive oil and voila!

Best warm or at room temperature but I don’t blame you if can’t resist digging right in. Wonderful with good, crusty bread, over pasta, with eggs, a green salad, etc.

P.S. I’ve just planned and posted my October and November class schedule including some soup classes, an everyday baking class, a fall preserving one focused on tomato and onion jams, etc.

Sugar

I grew up in a family where dessert was mandated (by my father) every night. I also grew up in Germany so fresh or cooked fruit with whipped cream or lightly sweetened quark was considered–and is–a wonderful dessert. We also had puddings, tarts, pies, and all sorts of wonderful German baked goods my American mother perfected to my German father’s delight. So there was always a little something sweet after dinner. We all loved it. I started making desserts at an early age and went through a long period of making Joy of Cooking layered cakes with things like orange cream filling and Devil’s Food Cake Cockaigne (what  does that word mean and where does it come from?).

I still love dessert  in all its wonderful forms but my palate has evolved a bit and I like things less sweet than I used to. I still love the occasional layer cake but am more drawn to fruit desserts, tarts, cookies, and quick breads these days. And I have to admit that I don’t feel so good after eating a lot of sugar. So I tend to reduce the amount of sugar in most recipes and make my jams with a quarter of the sugar I used to and think the result is often more flavorful. And besides the often-improved-flavor-factor I also know that refined sugars aren’t so good for us so, once again, moderation is here to save us!

I love David Lebovitz’s blog and implicitly trust every one of his recipes. However, I have become a bit of a pathological recipe tinkerer.  In part it’s because in order to properly use, e.g. adapt other published recipes you need to make them you’re own before you post them and because I’m just curious and I am Miss Cook With What You Have after all, so if I don’t have sour cream I’ll use yogurt or if I don’t have a scallions I’ll use a chunk of regular onion, etc. In any case one of David Lebovitz’s recent posts was about a zucchini cake. I tried hard not to tinker much so I only made two changes. I reduced the amount of sugar by a generous 1/4 cup and squeezed the grated zucchini out in a tea towel, removing some of the moisture and enabling me to pack more zucchini (but still adhere to his weight prescription) into this amazing cake. So instead of rewriting his recipe in my own words I’ll leave you with the link. Do be sure to use lemon zest, as he suggests in the body of the post but not in the recipe itself. And if you care to decrease the sugar, I do recommend it. Oh and I use my Zyliss cheese grater to grind nuts (almonds in this case) since it results in a much fluffier texture. I think food processor’s tend to turn them a bit oily and chunkier but either way will be fine I’m sure.

This cake instantly made my top-five dessert list. I think it’s that good. And since my summer squash plants are still producing we may have less ratatouille this year and more zucchini cake. Oh and I made the glaze exactly like he describes though mine soaked into the cake more and didn’t leave much of a visible coating. It did not seem to compromise the flavor and I definitely wouldn’t skip the glaze. So, go put those zucchini to use!

Ellis wishing I would actually let him eat that big of a slice of cake

Pizza (class)

It’s fun, it’s a treat, it can hold most anything, and it’s really good and easy to make at home. Whether you buy pre-made pizza dough or make it yourself (we’ll be doing the latter in class next week) it really is an easy meal. I forget about it for periods  and then when something inspires me to make one I always wonder why I don’t do it more often. The dough is easy to freeze so mix up a double batch and save  half.

I’m teaching a Pizza Class next Thursday, August 26 from 5-7:30pm  We’re going to be making fresh pizzas with homemade dough with Jim Lahey’s (of No Knead Bread fame) wonderful pizza dough recipe. Three kinds will be on the menu: Stewed Red Peppers and Sausage; Classic Margarita with tomatoes, basil and mozzarella, and Potato.

I’ve had many requests for this class and already have requests for repeating it though this class isn’t even full yet. So, if you’ve been meaning to learn or refresh your skills on pizza making, sign up. Three spots left.

Happy cooking and eating!

Making the Best of a Bad Purchase

I love Apricots and so does my 3-year-old son. Last summer he climbed up a ladder into an apricot tree and devoured 3 huge ones, never having tried one before. So in a fit of fear of missing the short apricot season entirely I purchased a case from a source I knew better than to trust in having good fruit. And I should have known better when, having asked the somewhat dumbfounded clerk if I could taste one before I purchased the case, I handed the other half to my son who took one bite and handed it back to me.


So I made two LARGE batches of jam, cursing my poor decision along the way. I typically add a bit of orange zest and juice to my apricot jam, something my grandmother always did (though she added pineapple as well) and with a bunch of lemon juice too, the jams are actually quite good. But now I understand why many people are uninspired by apricots.  There must be a lot of bad apricots out there. Apricots that are mealy and flavorless or hard and flavorless not sweet and juicy and musky and heavenly like they can and should be.


One of my earliest childhood memories is of driving through the Columbia River Gorge to Hood River to pick apricots and climbing ladders in the hot wind of the Gorge in mid-summer and eating and eating them up in the trees. And then driving home dusty and sticky, the car filled with the sweet warm scent of apricots.  They are really an easy fruit to work with too–a cinch to wash, no need to peel, and they’re free-stone.


So a few lessons from this experience. 1) I’ve been lucky to have grown up with good apricots. 2) Good products need much less doctoring and are delicious as is so if you’re after fresh eating, maybe better to skip them if they’re not very good. 3) The practice of breeding fruit (or veggies)  for portability and visual appeal rather than flavor is a shame. 4) I’ll buy my apricots from the farmers’ markets or u-pick in the future, even though I  know that this jam will be welcome in the dead of winter.

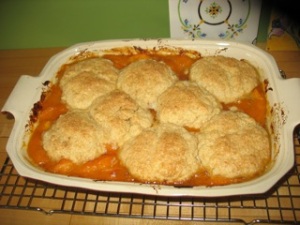
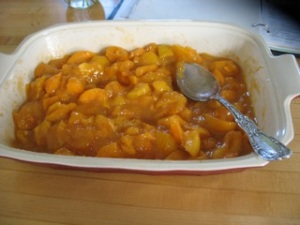
So today I decided to turn the final bowl of sorry fruit into a cobbler. This is hands-down my favorite cobbler recipe. It was originally written for Italian Prunes (or plums as most now call them) but is equally good with apricots and peaches or a combination or with the addition of a few handfuls of blackberries.

It calls for a bit of cardamom and crunchy turbinado sugar on the tops of the biscuits and is a perfect combination of juicy fruit and light, creamy biscuits. And the poor apricots, doctored up with lemon juice and zest, and said cardamom cooked up into a very good cobbler.

Apricot, Peach, or Plum Cobbler
–Adapted from Claudia Fleming


For the Biscuits:

1 2/3 cups all-purpose flour (or half all-purpose and half whole wheat pastry flour)

3 tablespoons sugar

3 teaspoons baking powder

1/4 teaspoon salt

6 tablespoons butter, chilled, cut into 1/2 inch pieces

2/3 cup plus 1 tablespoon heavy cream

1 tablespoon turbinado sugar

For the Filling:

2 1/2 lbs of fruit (apricots, peaches, plums or a combination) to yield 6-7 cups

1/4 teaspoon cardamom

1/4 teaspoon cinnamon

1/4 cup sugar


Preheat oven to 375.


To make the biscuits, mix all dry ingredients in a large bowl. Cut the butter into the mixture with a pastry cutter until the butter is the size of large peas. Stir the cream in with a fork and gather the dough into a ball. Turn it out onto a floured work surface and shape the dough into 8, about 2-inch balls. Place on a baking sheet and flatten slightly. Refrigerate for  20 minutes or up to 2 hours. If you’re in a hurry you can skip this step. I have had fine results as well.


Mix the fruit with the sugar and spices in a 2 quart gratin dish. I used cardamom and 3 teaspoons of lemon juice and the zest of half a lemon in my apricot version today and skipped the cinnamon. I also used a generous 1/4 cup of sugar. Taste the fruit before you bake the cobbler and adjust sugar to taste. Place the flattened balls of dough evenly on the fruit. Brush the remaining cream on the biscuits and sprinkle the turbinado sugar on top. Bake for 40-45 minutes until the fruit is bubbling and the top is lightly browned. Serve warm are at room temperature with whipped cream or vanilla ice cream.


And apricot cobbler for breakfast is a treat, even with second-rate fruit!