Blog

Artichokes

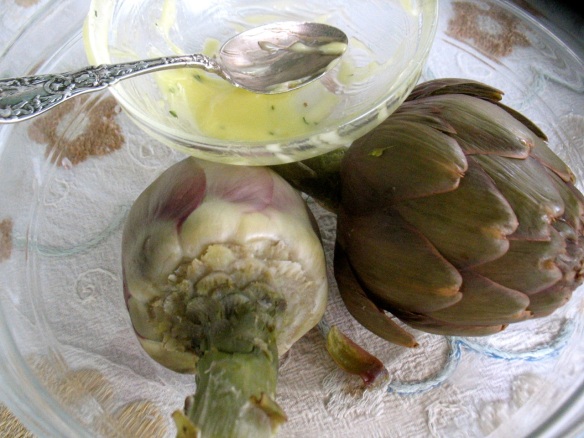
What was left of five artichokes the three of us had for dinner last night.

There were two things I remember eating in great quantity as a child (actually I’m sure there were many more than two) artichokes and corn on the cob. I think my artichoke record was four in one sitting and eight ears of corn. The corn was always homegrown and the ears weren’t usually quite as large as store-bought ones but still, I loved these two things. I have a feeling my four-year-old is going to give me a run for my money on the artichoke front soon. I certainly can’t put away four in one sitting anymore. And he ate one and a half artichokes last night and they were big.

For inexplicable reasons we haven’t eaten many artichokes for a few years but somehow this year the bug is back and I’m buying them at every turn. The ones pictured above are from a local farm (DeNoble Farm in Tillamook, OR) and are available at the Portland Farmers Market on Saturdays.

Growing up my mother boiled them and we dipped the leaves and much-anticipated heart in regular store-bought mayo and I loved them that way. Then I spent a lot of time in Italy and learned of the dozens of other ways of preparing them, all of which I loved as well. Most of those preparations–stuffed, grilled, roasted, in a ragout, in a frittata, etc.–are a bit more time-consuming so this spring I’ve mostly been doing it the good old American way.  I made them for my in-laws in Colorado 10 days ago and it turned out to be the first artichoke my father-in-law had ever had and he loved it.

For last night’s I used a bit of leftover aioli (with chives and thyme) and stretched that with the store-bought stuff and it was perfect.

I was much too excited to start eating to remember to take any photos of the original, beautiful bowl of five whole artichokes so all you get is the dregs that I promised I'd save for Ellis for dinner tonight.

So, if you want a low fuss summer meal, pick up a bunch of artichokes; get out big bowls for the leaves and thistle parts and a bowl of mayo, homemade or not and go to town.

P.S. I know it’s more common to steam artichokes but I’ve always just boiled them, water coming about half way up the artichokes (stem end down) for about 45 minutes to an hour (depending on size they might take longer). You want the stem and heart to be very tender when pierced with the tip of a knife or fork. When tender I hold them upside down by their stems to drain them well and then they are ready to eat. I’ve always assumed boiling was faster than steaming and I always seem to be in a hurry but by all means steam them if you prefer.

Wild Flowers and Summer Lentils

Nuttal Evening Primrose

We spent last week high up in the mountains in Colorado with my in-laws. Late June at 8500 feet in and around Rocky Mountain National Park is one heck of a beautiful place to be. I’ve always loved wildflowers but have rarely gotten out of the city in spring/early summer for many years. I became a certified wildflower geek, camera in tow, making everyone stop so I could take pictures and falling asleep with the wildflower book in hand. So this week you’re going to get a tiny sampling of those photos.

Colorado Tansy Aster Flower

Boulder Raspberry Flower

Wild Iris and Shooting Stars

When we returned home to a more or less empty fridge but thriving garden and well-stocked pantry/freezer I made a quick, hearty salad. I found a container of previously cooked French green lentils (Puy lentils) in the freezer.  I tend to cook lentils (regular brown, red, little green, etc. ) in the cooler months but I’m finding more and more uses for them this time of year and my four-year-old really likes them, so there they were waiting for me in the freezer.

I picked arugula, parsley, and chives in the garden, made a garlicky dressing with Greek Yogurt and that was it. I’ve given more detail in the recipe below but it’s really just a guide as to how one can use those heartier pulses (or grains) in summery ways. So experiment away with what you have in your garden, freezer, pantry and of course there’s that yogurt. One of my favorite cookbook authors Yotam Ottlenghi has a disclaimer in the headnote of one of his recipes (that I can’t seem to put my finger on at that moment) that goes something like this: “I know not all of you want to dollop rich Greek yogurt on everything you eat but in this case, it’s really worthwhile. . .”  I feel that way more often than not and in this recipe the yogurt turns into a silky dressing.

We had just barely unpacked when I made this dish and I neglected to take any photos. And I’m venturing to guess that the wildflowers were much more photogenic than this salad (or that my  very limited photography skills could represent).

Summer Lentil Salad with Yogurt Dressing

Serves 4 as a side or 2 as a light entrée

2 1/2 cups cooked and cooled small French green lentils (see note above)

3 -4 cups arugula (or other strongly flavored salad green) cut into 1-inch ribbons

1/4 cups of parsley roughly chopped

3 tablespoons chives, chopped

1 clove garlic, minced or mashed with some salt with the side of a chef’s knife

1/4 cup Greek or regular full fat plain yogurt

2 tablespoons good-quality extra virgin olive oil

zest of half a lemon

juice of half a lemon

2 teaspoons red wine or sherry vinegar (to taste) or just more lemon juice

salt and freshly ground pepper

Mix all ingredients together. Taste for salt and acidity and adjust as you like. Serve with good bread and cheese for a light supper.

Ponderosa Pollen Cone — I was completely fascinated by these cones. In another week's time they will "explode" and cover the whole landscape with yellowish-green pollen. They were so decorative and almost stylized looking and ranged in color from pale yellow to this deep rose.

Fava Beans

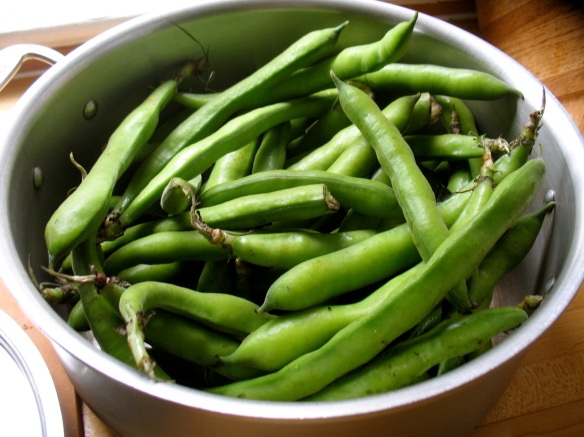
I learned how to cook fava beans like this from my friend Carol (of Ayers Creek Farm fame). Favas are a spring/early summer treat in our region and are only in the markets for a few weeks. They are often overlooked because most preparations have you shell them, then cook the beans and then peel each individual bean. And while the result is definitely worth it, it is a more labor intensive and time-consuming process than most veggies require. So since I learned the below method I enjoy far more fava beans each year.


You cook the favas, big squishy pods and all in a large pot of heavily salted water until the individual beans start following out of the pods and then you don’t peel the individual beans. So if you like fava beans and wish you used them more, make this and report back. Curious to hear if you love it as much as I do.

Fava Beans with Cilantro, Yogurt and Lemon


Carol Boutard of Ayers Creek Farm told me about this method of cooking fava beans which eliminates the time consuming step of peeling each individual bean. This is an Iranian way of cooking favas.


2 pounds fava beans in their pods

¼ cup kosher or sea salt

1/3 cup Greek yogurt or plain, whole milk yogurt (or more if you want it saucier)

1/3 – 1/2 cup finely chopped cilantro (can use a few tablespoons of chopped mint instead)

1 -2 teaspoons lemon juice (to taste)

zest of one lemon, finely grated

1 medium clove garlic, minced (or 1 stalk green garlic, minced)

1 tablespoons olive oil

salt & freshly ground black pepper to taste


Place your whole fava bean pods in a six-quart pot (or slightly larger). Fill the pot three-quarters full of water or until the favas are just covered. Add the salt (it seems like a crazy amount of salt but I promise it turns out just fine) and bring to a boil. Reduce the heat so the water stays at a rapid simmer and cook covered, until the pods start falling apart, between 20 and 30 minutes. Drain and fill pot of beans with cold water. This allows you to extract the beans more quickly. You can also just drain and let sit until cool. Remove beans from pods. There is no need to peel each individual bean. The skin should be tender and the beans perfectly seasoned. Toss beans with the remaining ingredients. Adjust seasoning to your liking. Enjoy as a side dish or on crusty bread or tossed with cold pasta for a hearty salad.


Fava beans cooked this way (and without the dressing) are delicious with pasta and a bit of parmesan, with boiled potatoes and parsley. I’ve added them to Israeli couscous with some mint and grated, hard cheese.

Bread (and a Cookbook Giveaway)

I grew up in Germany eating good bread. My mother (the American parent) quickly learned my father’s old world tastes and became an expert bread baker. She made a dense, chewy rye bread with cracked coriander in it and one of my fondest childhood memories was eating that bread, sliced thinly, toasted, then cooled and then smeared generously with butter and topped with apricot or raspberry jam. Heaven! And just as good, topped with Gruyère or Swiss Cheese our Gouda, again on lots of butter. My mother also  made yeast rolls and whole wheat sandwich bread and I loved all of it and remember rounding up my friends on weekend mornings in the tiny village we lived in to come have warm bread right out of the oven.

My mother still bakes bread but she lives more than an hour away and now she’s most famous for her biscuits, but that’s another blog post. And now I live two blocks from Grand Central Bakery which is quite fortuitous since my first job out of college was at Grand Central. I arranged the bread and pastry displays, learned how to make good coffee and made sandwiches–mostly I remember the daily marathon of making sandwiches during the lunch rush. I’ve always loved their breads with their fabulous crusts and chewy interiors.

Grand Central Bakery's new Whole Grain Sandwich Loaf

Now, however, they have a new kind of bread which in some ways is nothing like the breads I grew up on and tend to gravitate towards. However, it is packed with seeds and whole grains (very German!) but is made in a more classic American sandwich bread style, i.e. softer and more tender. What I like about it though is that it still seems like a real loaf of bread, not something that is overly processed or engineered, which is what most sandwich bread seems like to me. Note the lovely mouse hole, as we called those irregular holes as children, which to me signals real bread. I recently picked up a loaf and used it every which way.

With Sharp Cheddar and my mother's Bread & Butter Pickles, about to be grilled. . .

The grilled version of the sharp cheddar and bread & butter pickle sandwich was not very photogenic but boy was it good. A friend inspired me to make the below version with fresh goat cheese, minced, fresh thyme and cheddar and then I made another version with a bunch of parsley in addition to the thyme. All are worth repeating and were devoured by neighborhood adults and kids alike.

With fresh goat cheese and herbs and more cheddar. . .

The crunchy, gooey, savory sandwiches before they disappeared.

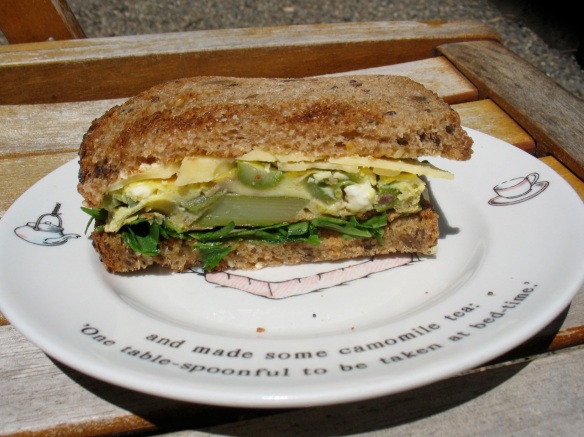
And finally, the bread served as a good vehicle for my leftover slice of asparagus and snap pea frittata that I enjoyed in the back yard on one of the sunny (!!!!) days we’ve had recently.

Frittata sandwich with arugula and some sharp cheddar, again.

This bread is available in the Portland and Seattle areas at all the Grand Central Bakery storefronts but also in Portland at Pastaworks, Zupans, Whole Foods, New Seasons and Beaumont Market. And for those of you who do not live in the area, I hope you have a good alternative.

Lastly, to further honor my erstwhile employer, I’m going to give away a copy of the Grand Central Baking Book co-authored by the lovely Piper Davis and Ellen Jackson. This book is a collection of many of the bakery’s beloved treats for any time of day, sweet or savory.  So leave a comment about bread and/or sandwiches and I’ll randomly choose a winner to receive this gorgeous book.

Lastly, there are still spots available in my June 23rd Lunch Time Class and the June 25th improv class in which we’ll truly cook with what we have and collectively come up with a menu.

Happy Cooking and Eating!

The Nonplanner

There are those who make a meal plan at the beginning of each week; make a grocery list for those specific dishes and then proceed through the week accordingly. It works for many, gives structure, reduces stress (for some) and has a certain order.

Soba noodles, bok choi, cilantro and sesame seeds–most of what I need to make this last minute dish.

I’m decidedly not in this camp. I couldn’t begin to tell you what I might make five days from now. As you can tell from this blog, I’m the last-minute gal. I shop to restock my kitchen, not for specific recipes (with a few exceptions). And sometimes, like today, it’s a bunch of bok choi that was gorgeous at the farmers market on Saturday but is already looking a little worse for wear and two handfuls of cilantro that will be slimy by tomorrow that inspired tonight’s dinner. I have soba noodles and sesame seeds in the pantry and those are the other key ingredients for this cold soba salad. It’s a flavorful, good spring salad and with a couple of fried eggs on the side or a frittata will make a fine, light supper.

And I should note that I do some planning, though in a very different, general/ad hoc sort of way.  I cook extra beans and grains to freeze for later use, have veggie bouillon in the freezer, and sometimes have a few hard-boiled eggs in the fridge. And that, along with a well-stocked pantry serves me well since I usually enjoy the last-minute  game of deciding how to use those veggies about to go south or that beautiful bunch of asparagus or  the couscous my son loves. . . . And another note on the pantry and being stocked. It’s lovely having things like sesame seeds on hand, that after a quick toast in a dry pan, add a lot of flavor and texture to many dishes. Much like my last post about herbs, something as simple as a handful of sesame seeds can drive my decision about what to make for dinner. It doesn’t always have to start with the protein or starch or even veggie. Any key element of a dish can be the inspiration.

Cold soba noodle salad with bok choi and sesame seeds

Asian Noodle Salad with Toasted Sesame Dressing

– Adapted from Feeding the Whole Family by Cynthia Lair

1 (8-ounce) package soba noodles (or whole wheat spaghetti – Barilla is a brand for this)

¼ cup sesame seeds

¼ cup chopped cilantro

1 bunch bok choi, young mustard greens, chard or most any other green washed and cut into ½ inch ribbons

2 tablespoons toasted sesame oil

3 tablespoons tamari (or regular soy sauce)

2 tablespoons red wine vinegar

1 tablespoon maple syrup or honey

pinch or two of chili flakes (or more depending on your taste)

Cook soba noodles according to package directions. About 3 minutes before the noodles are done add the chopped greens to the noodles, bring back to a boil and cook for a few more minutes. Drain and rinse noodles and greens in colander.

Toast sesame seeds in a dry skillet over medium heat. Keep seeds moving until they give off aroma, pop, and begin to brown. This just takes 3-4 minutes. Remove and set aside. They burn easily so watch carefully.

Mix dressing ingredients in large bowl, add noodles, greens and cilantro. Mix well.

You can also add grated carrot, scallions, or choose to cook a different vegetable with the noodles such as broccoli, green beans, peas, etc.

Herbs to the Rescue

Chives and Oregano in my garden. They both come back year after year with total neglect from me (other than cutting back the oregano each winter).

Herbs are always at or near the top of the home gardening lists that tell you what things are most economical to grow yourself, i.e. where your gardening efforts will result in the most savings in your grocery budget. Those bunches of herbs in plastic clamshells are expensive and rarely very fresh.

I started with a few parsley starts about 8 years ago. I let a few go to seed every year (they are biennials though so they have two seasons before the go to seed) which keeps me in new seedlings so I always have plenty of parsley–one of the most versatile herbs.

In addition to saving $$ many any of them grow with the most minimal care and attention and some do well from seed so your up-front costs are truly minimal. They can grow in pots on your window sill, deck, porch, fire escape. . . and of course in any free spot in the ground. And they are delicious, nutritious and can make most any staple, from eggs, to grains, beans, veggies and meats, sing.

Having just returned from a trip my refrigerator was fairly bare this morning and I needed to make lunch for my husband to take to work and for myself at home. And since I am a bit bean-crazed or as a neighbor noted yesterday, the bean queen, I was able to pull together a decent lunch thanks to the parsley and oregano in the backyard. I had thawed a container of white beans when I returned yesterday so I had those. I chopped up a few handfuls of parsley and oregano, added some lemon zest, juice, chili flakes, olive oil, and salt and pepper. I mixed that with the beans and filled some whole wheat tortillas with that on a bed of grated sharp cheddar.

Quesadilla with white beans, herbs and sharp cheddar, aka impromptu, filling lunch.

I do realize I’ve been emphasizing greens and beans of one sort or another here for a while but in this in-between season of sorts, before the summer squash and tomatoes, beans, peppers and corn surface, they’ve been keeping me good company.

I’ve also been working on an upcoming class on salad rolls that is one of the most fantastic uses of herbs I know. Rather than the sideshow, they are the main attraction in salad rolls, even edging out that peanut sauce. There’s still plenty of room in that class if you’re interested in learning how to make this simple delicacy.

Mint might be the most prolific herb and is best grown in a pot since it can take over any garden. Mint features prominently in the upcoming Salad Roll class on June 25th.

The herbs I grow and love to cook with most are: parsley, chives, thyme, oregano, mint, sage, tarragon and rosemary (actually  my neighbor has the giant rosemary bush) and cilantro, though it bolts easily and has a shorter season than the rest and you have to keep seeding it so it’s actually probably easier to buy.

Happy Cooking and Eating!

Simple Pleasures?

I shop at my neighborhood farmers market (and a few others too). The neighborhood one is small with only a few produce vendors right now. There will be more later in the season. There isn’t a wide variety of produce right now and I like it that way. It simplifies my life. I have fewer choices but all the choices are fresh, delicious and beautiful (and come in more shades of green than you can imagine). I have an easy time deciding what to teach in my classes and feed my family.

Now on to the trickier subject of how simple shopping like this is for the average Joe/Jane. Farmers markets have been popping up all over the country and the recent attention to food deserts (neighborhoods with little or no access to fresh produce and other food supplies) is helping. But many neighborhoods lack farmers markets (or even grocery stores with good produce) and the limited market hours don’t work for everyone. My neighborhood market does accept SNAP cards (formerly known as food stamps) and even gives shoppers using their SNAP card an extra $5 to use at the market.

But we have a long way to go to make the way I shop more prevalent. I’m headed to New York City later this week for a board meeting of Slow Food USA. And we’re going to be talking about just how we continue to build a movement in this country to make access to these simple, but pretty critical pleasures, a reality for many more people.

Spicy Spinach with Toasted Coconut.

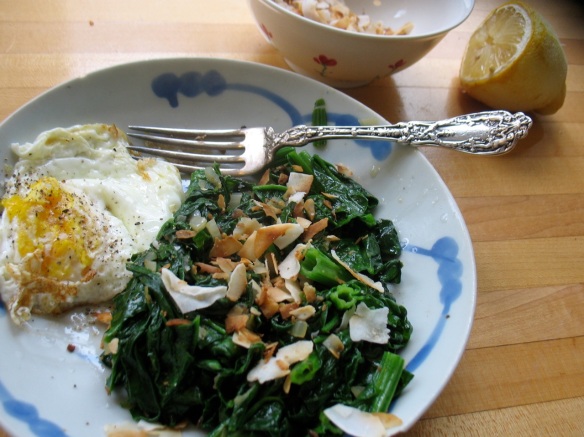
One of my green-hued market purchases last week was a lovely bunch of spinach. And thanks to Heidi Swanson, it turned into a perfect lunch. There’s been a lot of love in the food blogosphere for Heidi and her new book Super Natural Everyday lately and I’ll happily add my accolades to the mix. This recipe is not from  her new book but from a recent post of hers. Enjoy!

Spring Meals

We’ve had some sun and warmth, albeit fleeting, here lately in the Pacific Northwest. And while it isn’t really warm enough yet to ditch the socks and shoes I’ve been cooking differently. Against all the weather odds the farmers markets have beautiful produce and we’re eating asparagus and radishes several times a week. Below is a quick review of some of my favorites from the last 10 days.

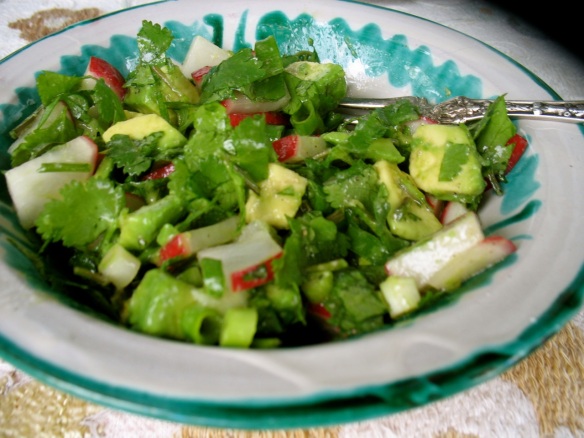
Salad of avocado (not from the farmers market!), radishes, lots of cilantro, scallions and lime juice.

Asparagus Quinoa "Risotto"

I blogged about this dish last spring and had to make another mention of it. It’s not like risotto in that you don’t slowly add stock and stir as it cooks. In all other ways (excepting the grain itself) it is like risotto. It takes about 18 minute start to finish and is one of the most satisfying one-dish  meals I’ve had in a while. The quinoa is added to sautéed onions and a bit of diced bacon, then hot broth is added–cover the whole thing and cook for 10 minutes then spread the asparagus on top and cover again for a few minutes until tender. Then mix some grated parmesan and butter into the whole thing and voila!

Roasted cauliflower and asparagus, canned Oregon albacore, fried potatoes and salsa verde.

I make so many variations of this sort of meal. Roast or blanch or boil whatever veggies you have. Add some  good canned tuna and drizzle the lot with salsa verde.

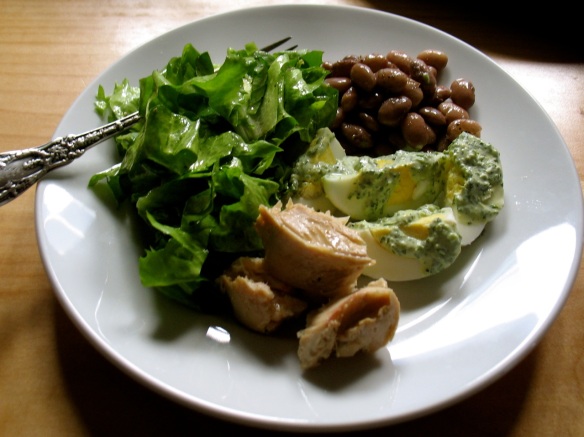
Greens, beans, eggs, tuna, and cilantro yogurt sauce.

I guess this is the protein heavy version with home-cooked pinto beans, my favorite Oregon Albacore (from Stonewall Banks Seafood), hard-boiled eggs, greens and cilantro yogurt sauce.

All of these meals were fairly quick, last-minute kind of  meals and if you already have cooked beans and/or eggs all you have to do is make your sauce, dressing of choice or cook the quinoa and you’re set.

As much as I love to cook, this time of year I’d rather spend more time in the garden or have a beer at the neighbors watching all the kids in the neighborhood chase each other down the slide in the early evening sun!

Bake With What You Have – Part I

Apple Oat Muffins . . . not the most photogenic muffins in the world but satisfying nevertheless.

I have a private client at the moment who has three sons; 11, 14 and 16. I grew up with three brothers so I know how much they can eat, but for years now I’ve lived in a household of two and more recently three and I’m just not accustomed to those quantities anymore. This client wants ideas and recipes for hearty, healthy snacks for the boys. So I’ve been testing and making a variety of things including lots of muffins. Muffins are in many ways ideal: they are baked in individual portions; they freeze well; they are portable; and they are adaptable to many different tastes/styles/ingredients. I have a feeling my client’s boys could eat a whole batch of these in one sitting but for those with smaller families, freezing part of the batch is a great idea.

I have always loved to bake and made more than my fair share of layer cakes out of the Joy of Cooking as a teenager. My tastes have changed over the years and I like things a bit less sweet now but until a few years ago, I carefully followed dessert recipes. Not anymore. The cook-with-what-you-have mindset has wormed its way into my baking (and other desserts) as well and I substitute and tinker to my heart’s content. There are still some recipes I strictly follow and certain chefs whose recipes I know better than to change because they are always perfect (David Lebovitz among others). . . .However, muffins are the perfect foil for tinkering and I want to convey that freedom to adapt baked goods like this to my client(s) so that good, home-made snacks like the below muffins become part of people’s regular routines.

I’ve been playing with these Apple Oat Muffins this week and they are a perfect example of a quick-to-make snack (dessert, breakfast, picnic treat) using items you might already have in your pantry or you can substitute with ingredients you do have on hand. They are just barely sweet but the combination of the fruit, the texture of the oats and the spices works well.

These muffins call for as much oats (by volume) as flour.

Muffin (and waffle, pancake, biscuit. etc.) recipes often call for buttermilk. I hardly ever have buttermilk on hand so I substitute either whole milk with 1 tsp of lemon juice per cup of milk or yogurt or a combination. Both work really well. I use whole milk in all my baking/cooking and think it gives the best results but 2% is workable too.

These muffins would also be delicious with the addition of raisins, chopped walnuts or almonds, shredded coconut, other dried fruit or fresh blueberries or raspberries. You could substitute mashed bananas for the apple sauce though you might reduce the sweetener a bit since bananas are sweeter than apples. And speaking of sweeteners, you could substitute maple syrup for the honey or use brown sugar or granulated sugar though honey is a bit sweeter than sugar so reduce the sugar amount by 1/4 or so.

You could also play with different kinds of flour or combinations of flour. You might use half spelt flour and half all-purpose, etc. Kim Boyce’s wonderful book Good to the Grain is a wonderful resource on whole grain flours of all kinds.

Apple Oat Muffins

When tinkering with baked goods you do want to keep the proportion of dry and wet ingredients the same. There are a few other rules (which I will explore in Bake With What You Have – Part II) but muffins are pretty forgiving so go ahead and play around and see what you like.

These muffins are not very sweet. If you like things a bit sweeter by all means add a few more tablespoons of honey.

12- 15 muffins

1 1/4 cups whole wheat flour (or other flours-see note above)

1 1/4 cups oats

1 tsp baking powder

1/2 tsp baking soda

1/4 tsp salt

1/2 tsp cinnamon

1 cup unsweetened applesauce

1/2 cup whole milk or plain yogurt (if using milk, add 1 tsp lemon juice or white wine vinegar)

1/3 cup honey (or other sweeteners-see note above)

2 tbsp olive oil or sunflower oil (or other vegetable or nut oil)

1 large egg, lightly beaten

1 large apple, peeled, cored and roughly chopped

grated zest of half a lemon (optional)

Preheat oven to 400 degrees.

Lightly oil or butter a 12 cup muffin tin.

In a large bowl combine flour, oats, baking powder, baking soda, salt and cinnamon. In another bowl combine applesauce, milk (or yogurt), honey, oil, egg and lemon zest, if using. Combine wet and dry ingredients and stir quickly until just combined. Add the chopped apple and fill muffin cups.

Bake for 16-18 minutes.

Ellis loves muffin-testing days.

Salads and Beans

My Lunch Salad

The lettuces and other greens that overwintered in my garden don’t seem to mind the cold wet spring. The longer days and occasional rays of sun are enough for them to grow a few inches a day it seems. And as noted in last week’s post, my neighbor’s greens are even more prolific.

Not only are the cultivated greens thriving these days but so are the wild ones. I have never known much about what edibles one can forage but last week I had the pleasure of hosting a local TV news station and Edible Portland in my kitchen. They filmed a segment on wild edibles that had been picked earlier that morning in an urban neighborhood here in Portland by John Kallas, one of the authorities on wild foods. John wrote a comprehensive book on wild edibles including lots of recipes and photos to identify these delicious and nutritious foods. So if you don’t have any lettuces in your garden you  might want to check out the book and then take a walk in your neighborhood and see what you find. The salads and frittatas we sampled during the filming were delicious.

Cooked Pinto Beans, previously frozen

And beans! I love beans and to my great delight I caught a bit of Splendid Table (the NPR weekly food show) on Sunday about some of the healthiest people on earth who live in Turkey and eat lots of beans, olive oil and red wine.

But back to yesterday’s lunch salad–the salad I make in some fashion several times a week for lunch and for dinner has two main components: greens and beans. I always have home-cooked beans in the freezer and usually a quart in the fridge (canned beans work fine for this kind of thing too). And in the winter I almost always have kale around (which works beautifully in this hearty salad in its raw state) and the above mentioned greens. You really can use most any kind of green leafy item from spinach to kale to watercress and arugula to endive to romaine. Same with the beans. . .. red, black, pinto, white, garbanzo are all delicious.

Nice additions to this salad foundation are some of kind of cheese, hard-boiled egg,  some herbs or nuts, thinly sliced onion or minced garlic. . .. You can also play with the ratio of beans to greens. If you want a bean-heavy salad, just chop the greens and herbs a little finer and have the focal point be the beans, eggs, nuts, etc. And finally you need a zippy dressing. My standard is good olive oil (I like Unio by Siurana available locally at Pastaworks), lemon juice or red wine vinegar, salt and pepper and my secret ingredient: reduced apple cider. I take a half-gallon of organic apple cider and bring it to a boil in a big pot and reduce it at a rolling boil until it gets a little syrupy and viscous. I usually get about 1 1/2 cups from half a gallon. I store the syrup in a jar in the fridge and add a couple of teaspoons to my salad dressing.

Lunch Salad with Pinto beans, lettuces, hard-boiled egg, sharp cheddar and onion

With or without a slice of good bread (or maybe a batch of cornbread at dinner time) this is a light but satisfying meal.

And finally, since I promised you two recipes this week, here is a link to a recipe from my current favorite cookbook: Plenty by Yotam Ottolenghi from the eponymous restaurant in London. I  made these leek fritters last night and reluctantly sent my husband off to work with the leftovers.

P.S. There are a few spots left in my May classes, including next week’s Spring Market Class.

Greens & Bean Salad

See notes above about how to adapt this kind of salad to your liking and to what you have on hand, and hence the vague quantities below. This is really more of an idea than a formal recipe.

2-4 cups of packed greens of your choice

1-3 cups cooked (or canned) beans of your choice (pinto, black, white, garbanzo. . .)

2 hard-boiled eggs, roughly chopped

1/2 shallot or small chunk of red or yellow onion, slivered or diced

1-2 ounces of cheese of your choice (feta, sharp cheddar, fresh goat’s cheese. . . )

handful or two of raw or toasted nuts (walnuts, almonds, hazelnuts, pine nuts. . .)

1/4 cup roughly chopped herbs (parsley, basil, chervil, tarragon, cilantro. . .)

Dressing

1/4 cup of good olive oil

2-3 teaspoons lemon juice

2 teaspoons reduced apple cider (see note above) (optional)

salt and freshly ground pepper

1/2 clove of garlic, minced

Place all salad ingredients in a large boil. Mix dressing and drizzle over salad and toss well.

Going Out

Egg carton from a recent egg pick up

It is gorgeous today here in Portland. We’ve seen remarkably little of this kind of weather this spring and it’s all I can do to not play hooky and go sit in a park with a book. And as I was sorting through the egg cartons that need to be returned to the place where I pick up eggs every week I found the one pictured above. It certainly sums up my feeling today. . .

And one more photo from this morning, from a neighbors’ front yard. There are still plenty of edible bits on these leggy shoots of kale and arugula and I’ve gotten in the habit of walking down the street mid-morning to pick the greens for my lunch.

Tuscan kale and arugula going to seed.

And now I will go outside, not to a park with a book but still outside!

Happy Spring, once again!

P.S. I promise to post two recipes next week to make up for today’s lack of any.

Silver Linings and a One-Pot Dinner

Wild Rice with Veggies and Sausage

I like to get things done. I usually love working hard, whether it’s prepping for my classes, reviewing budgets, cleaning the bathroom, cooking three meals a day or planting the garden. I think of myself as strong and able, or thought of myself that way until recently, and not often in need of asking for help. But now I have some disk/spine issues that are turning my m.o. on its head. It’s painful physically and challenging emotionally but over the last few weeks, it’s gradually become less so.

As a dear friend said to me recently: “People really like helping out!” And it seems she’s right and come to think of it, I like to help others out too. So I have been asking for a lot of help lately. It’s getting easier to ask and with the additional help some of the physical pain is easing too. I’m definitely not used to my new, physically weaker, self and have my moments of intense frustration, but having people around to help me prep for and assist with classes, do the heavy lifting in the garden, etc. has been fun. I have a fairly solitary job, except for the actual time spent teaching, so having other people around for these  tasks is a joy.

I’m letting go of some of the control I didn’t quite realize I liked and practiced so much and learning as a go. I am doing things more slowly, I’m cutting more corners and not feeling guilty (the back steps did not get swept before my students arrived on Saturday and I didn’t scrub the hood over my stove within an inch of its life). And when it comes to cooking, I’m trying new things too. I’m using my food processor much more since I just plain can’t chop much by hand and have had to slow down.

And now I’m going to ask for your help and comments. Last night I pulled together a somewhat typical cook-with-what-you-have kind of meal. It wasn’t great (yet) but it was certainly fine. And the method was fun and got me thinking about all the possibilities of what I think I might call Dinner Pilaf for now. Pilaf has its roots in Turkey and Persia but there are versions from dozens of countries. Principally it is rice cooked undisturbed in broth or water with seasonings and other additions.

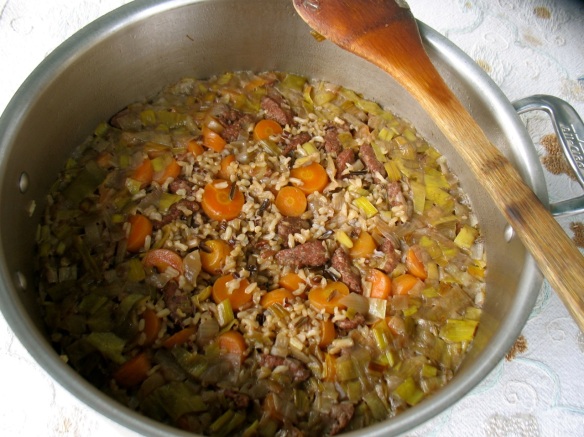
I discovered some wild rice in the back of my pantry yesterday. I had two leeks that needed using, half an onion, a few carrots, half a bunch of parsley and some pork sausage in the freezer. I sautéed the leeks, onions, and carrots; added the sausage cut into half-rounds. After all that was starting to brown I tossed in the rice, some veggie bouillon, covered it and brought it to a boil, then turned it down and walked away–for about an hour.

"Dinner Pilaf"

When I came back I found a beautiful pot of dinner. I had not measured the liquid carefully and it was a little wet for my taste and it was a bit bland. I minced the parsley and added two minced garlic cloves, a couple of teaspoons of lemon juice, some olive oil, salt and pepper (a simplified version of salsa verde) and stirred that in. Now it was good!  It wasn’t really a pilaf but somehow the idea of cooking rice or other grains or a combination of rice and beans with aromatics and veggies or meat with just enough liquid to cook it all seems rather clever. So I’m going to try this with barley and quinoa and other kinds of rice and with different veggies, spices and herbs . . .  And I’d love it if you experimented with this idea/method and reported back what you discover.  Or if you already make something like this tell us what you do.

Happy cooking and eating!

Carrots

I’ve been making grated carrot salads for years. I love them especially in the winter and early spring. Dressed with plenty of lemon juice and fresh herbs they are a nice counterpoint to the heavier and sweeter flavors of the season.

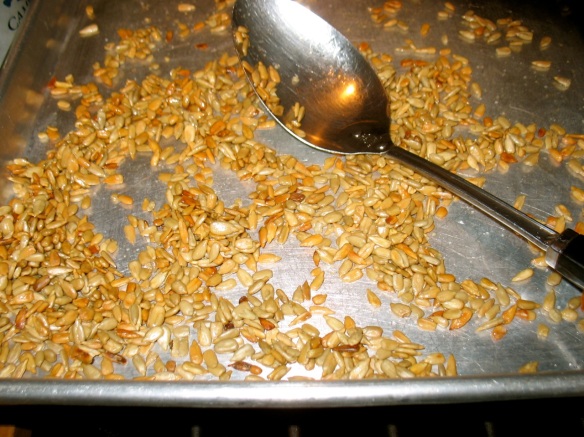
Toast extra seeds to you have them for future salads/snacks and so you don’t skimp on the amount you add to the salad.

This recipe makes a lot but I still love it the next day even though the seeds lose a bit of their crunch. But by all means, make less.


Carrot and Seed Salad with Herbs and Seeds

–inspired by Breakfast Lunch Tea by Rose Carrarini


3/4 cup sunflower seeds (or pumpkin seeds)

2 teaspoons oil & few pinches salt (to toast the seeds)

6-7 medium carrots, grated

1/2 cup (or more) chopped fresh herbs like chives, parsley, mint, cilantro etc.

Dressing:

3 tablespoons lemon juice, more to taste

scant 1 teaspoon sea salt, or to taste

1/2 teaspoon ground black pepper

3 tablespoons olive oil

Preheat oven to 350.


Toss the sunflower seeds with the a little oil and several pinches of salt and toast on a baking sheet for about 12 minutes, turning occasionally, until they are crisp and golden. Set aside to cool.


Place the grated carrots in a serving bowl with the herbs and the dressing ingredients. Toss well and add toasted seeds and taste adjust seasoning with more lemon and/or salt, if needed.

What to do with that half-bunch of Cilantro?

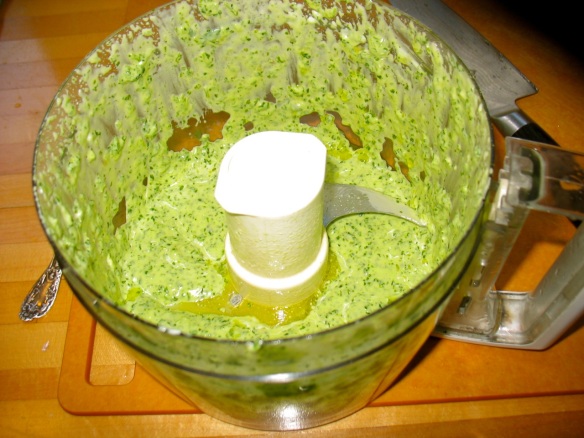
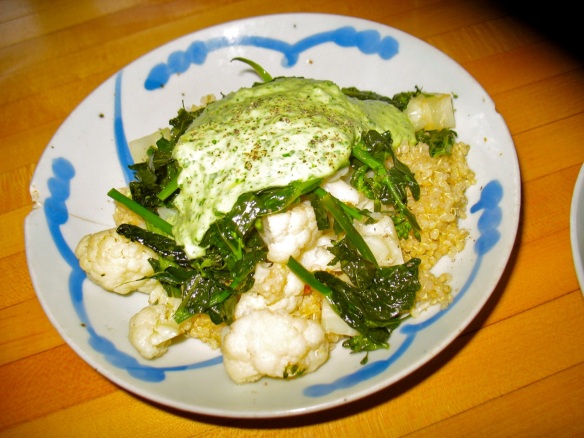
What do you do with that leftover cilantro in the fridge? That is one of the most commonly asked question in my classes. Sunday night I used a somewhat ratty-looking half-bunch of cilantro and whizzed it in the food processor with two to three tablespoons of Greek Yogurt , the same amount of good olive oil (the kind you might use for drizzling on soups or in salad dressings), a clove of garlic, some salt and a splash of lemon juice, to create this luscious sauce. You could also just finely chop the cilantro and stir everything together by hand so don’t  fret if you don’t have a fancy machine or don’t feel like cleaning it afterwards.


Cilantro Yogurt Sauce


I served it over cauliflower and some kale raab (kale going to seed in my garden) and quinoa. It was yet another cook-with-what-you-have dish that came together in no time, was very flavorful and used up that cilantro.


Quinoa with Cauliflower, Kale Raab, and Cilantro Yogurt Sauce

I cook with lots of herbs. I grow many but have never had much luck with cilantro. It bolts too quickly! Cilantro is one of my winter-time workhorses in the kitchen and I incorporate it in soups like this; or add lots of it to homemade mayonnaise that I make with lime juice instead of lemon and serve with roasted sweet potato wedges.

Herbs add flavor, color and nutrients to any dish and are an inexpensive way to round out a dish. I can imagine this sauce topping a chickpea or lentil dal, or some grilled fish (or in fish tacos), or with other roasted vegetables. It is the kind of thing that makes cooking with what you have on hand feel like a coup. I love it.

Getting Comfortable

My son started preschool  a few days a week a little more than a year ago. I used to pick him up late afternoon and would invariable find him with a teacher, observing the other kids playing and clean as a whistle. His school has an enormous outdoor garden and play area and most of the other kids would be chasing each other over and around every structure and plant or digging in the sand-box and muddy from head to toe. He liked school but for many, many months seemed overwhelmed by the outdoor play time and just quietly watched and waited for me to come get him. This is no longer the case. Now he’s so occupied with his friends he often doesn’t want to leave. He wants to add one more room to his stick house or finish collecting rocks and yes, he’s dirty from head to toe and grinning from ear to ear.

Pristine beginning. . .

In the kitchen this evolution usually takes just a few hours–from clean, organized and quiet at the beginning of class to messy, colorful, and animated by the end. I won’t stretch this metaphor too far but the ease and joy I observe in many of my students as they get comfortable chopping and stirring and tasting is remarkable. And the more we experiment and adapt in class the more fun it seems to be. Students generate ideas on how to adapt a dish to suit their child’s or partner’s taste or how to personalize it in some other way.

Full and happy . . .

The "dirty from head to toe" part.

Cooking is as much art as science and I still find myself grinning from ear to ear when I concoct something edible and maybe even memorable out of a few very basic things I have in the house.  And luckily most weeknight meals don’t result in the above level of mess, especially when you have some pre-cooked beans on hand, some tortillas in the fridge and a few sundry items. I’ve been having some neck and shoulder trouble these days and find myself making the simplest possible meals. The below creation was just such a meal. It came together by default but will certainly come together on purpose in the future. I sautéed some Swiss Chard and scrambled some eggs when it had just softened. A bit of  grated sharp cheddar on a whole wheat tortilla was the bed for the eggs and greens, and then I topped it with pinto beans and chickpeas and a drizzle of hot sauce. I briefly warmed the whole thing in a skillet, then folded it up–10 minutes, at most.

Two-bean, egg, cheese and chard burritos

If you’d like a chance to get more comfortable in the kitchen and get your hands on lots of spring greens and other produce you can join me for one of  the new classes I just posted.

Happy Cooking and Eating!

Beets and their Greens with Garlicky Yogurt

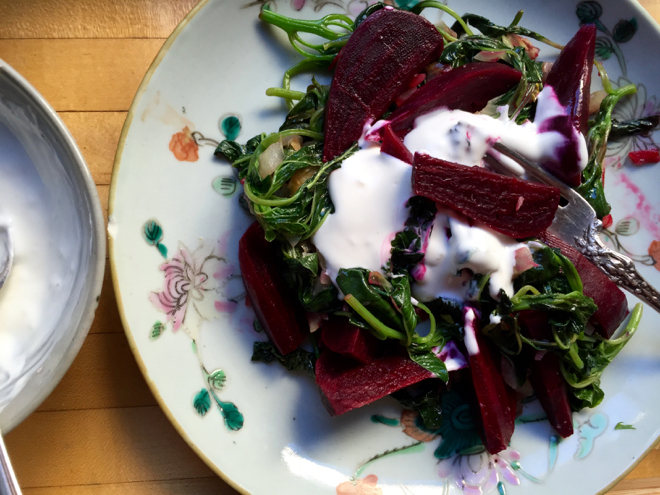
I’ve been topping dishes with Greek yogurt for years now and when doctored with a little mashed garlic, salt and a squeeze of lemon it’s the perfect complement to sweet, earthy beets.

Beets and Beet Greens with Garlicky Yogurt

1 bunch of beets, with greens (4-5 medium beets) or whatever you have on hand
3 small cloves of garlic, divided and minced
1 medium shallot or chunk of onion, finely chopped
½ cup of Greek yogurt or plain, full fat yogurt
1 teaspoon lemon juice plus an extra squeeze or two
Olive oil
Salt and freshly ground pepper

Cut the greens off the beets, wash well and cut into wide ribbons. You can use most of the stems. I usually just toss the 2-3 inches closest to the beat root. Scrub the beets well and cut into wedges. Put the beets in a small pan and cover with water. Bring to a boil and cook covered for about 15-20 minutes until beets are tender when pierced with a fork. Drain well and toss with a little lemon juice and salt. Meanwhile saute the onions or shallots in a little olive oil over medium high heat until soft. Add beet greens and a little olive oil if necessary and one clove of garlic, minced, and a few pinches of salt. It will only take about 3 -5 minutes for the greens/stems to be tender. In a small bowl mix the yogurt with the remaining garlic, a pinch or two of salt and the teaspoon of lemon juice. Mix the beet wedges with the greens and heat thoroughly and then serve with a generous dollop of the yogurt.

Bread


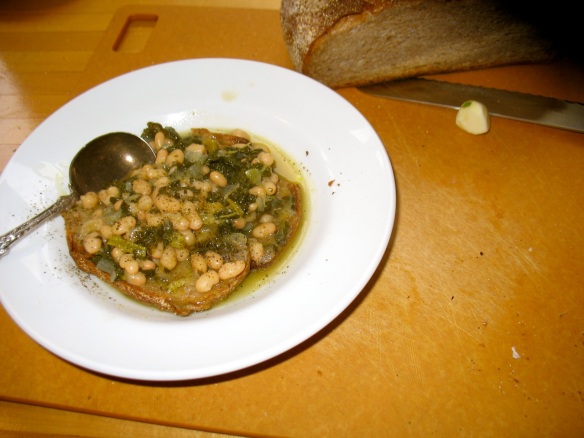
Bread, toasted and rubbed with garlic, soaking up a kale and white bean stew.

Bread came to the rescue this weekend. A dear friend was visiting (the one for whom the wedding cake was made) from out-of-town. She showed up on Saturday mid-afternoon and both of us happened to be starving. I had some day-old white bean and kale soup on the stove. It was a fine soup, a good soup really, but there wasn’t a whole lot left. So I toasted a couple of slices of bread, rubbed a garlic clove across the warm slices, covered them with hot soup, drizzled on a little good olive oil and a bit more salt . . . And we enjoyed a most satisfying mid-afternoon meal.

Bread comes to my rescue a lot actually. In savory bread pudding, in bruschetta with stewed leeks, for quick lunches with a salad, for soaking up the tomato sauce in which I poach eggs, etc. Bread has been getting a bad rap lately and I want to counter some of that with a little bread appreciation today. And I do know and understand that some of you can’t tolerate bread and I’m not trying to rub it in, but for the rest of us, it can be a handy, tasty and nutritious life-saver. And of course it truly is a life saver in much of the world. A vast percentage of the world’s population subsists primarily on a variety of grains and for more than six thousand years people have been baking leavened breads with many of these grains.

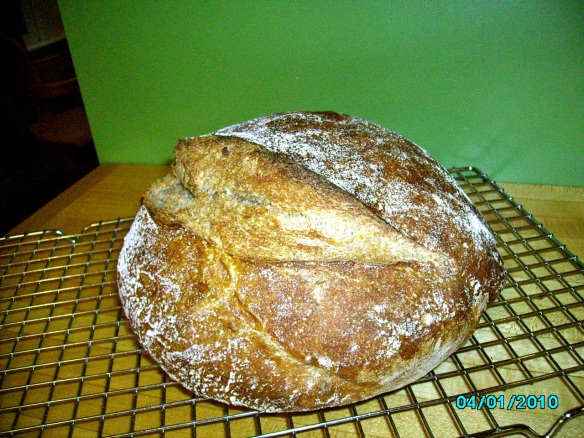
75% Whole Wheat No-Knead Bread

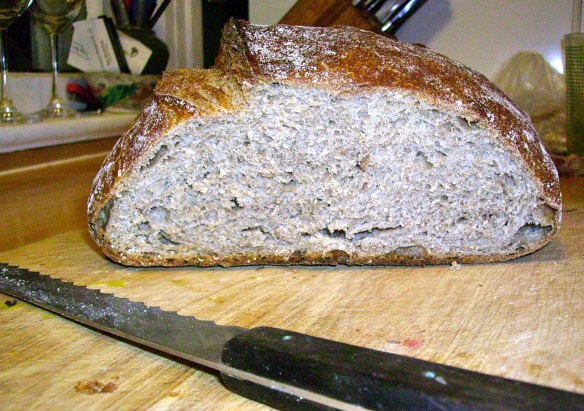
After many years of making the  no-knead bread made famous in the New York Times I still swear by it. I make a whole wheat version with 75 % whole wheat flour*, which is what you see above. It has a wonderfully open and airy crumb, loads of flavor from the wheat and the long rising period and a serious crust. It is definitely my pinch hitter. . . yesterday I toasted a slice and slathered it with almond butter as I ran out the door to pick up  my son. It’s one of his favorite snacks and mine as well. Yesterday I also made dinner for friends who just had a baby. I made winter squash and onion panade (for which I’m going to post the recipe soon) which consists of stale bread turned into a gratin with caramelized onions, diced winter squash, veggie broth and cheese and a raw kale salad with hearty bread crumbs and a garlicky lemony dressing. Because of bread’s long history, most cuisines/cultures have ways to use up the stale stuff which I think merits a post in-and-of-itself soon.

Fresh out of the oven

Until then . . . Happy Cooking and Eating!

* A quick note on flours. It’s important that you use bread flour in this kind of bread since it’s made from wheat that has a higher percentage of protein/gluten (than all-purpose flour) which is what gives bread its strength and structure.

Swiss Chard Tart

I just unearthed some old files, two of which were noteworthy.  One was filled with menus I’ve kept over the years from memorable meals out or from restaurants I was reviewing for a local weekly newspaper many years ago. The menus were grease-stained and creased and typed in every imaginable font and printed on every imaginable kind of paper and they brought back many, lovely memories.

The second file was full of clippings.  They are mostly from the New York Times and are lengthy articles with gorgeous recipes with vast ingredient lists. I guess the fact that this file ended up in an unmarked box in the basement for over 10 years is noteworthy in-and-of-itself . . .. Ironically, the title of the first piece in the file is “In a Berkeley Kitchen, A Celebration of Simplicity.” The menu discussed in this piece is: brine-cured roast turkey, fresh oysters, terrine of foie gras, bagna cauda, pork sausages, and cranberry upside-down cake. Simple?

Swiss Chard Tart

It’s not that I don’t occasionally cook fancy meals or that I no longer like reading about elaborate, delicious feasts, it’s just that in my professional life of  Cook With What You Have I am focused on demonstrating how truly simple and satisfying the plainest of dishes can be. Whether you’re short on time or money or both, it is possible to bring good, real food to your table occasionally and possibly even often. I actually think  Alice Waters (of the above piece) would sign on to this too. . . . it’s just that she has access to ingredients and means many of us only dream of. . .

The star of the show.

In any case, the recipe I want to talk about today is kind of a happy-medium between “Alice Waters simple” and “really simple”. It’s a Swiss chard tart I’ve been making for a while now and it’s both refined and rustic, quick as tarts go, but still a bit more work than a fast soup or pasta. It calls for lemon zest and nutmeg (the fancy ingredients) but if you have neither on hand, it’s dandy without too. It, like this recipe and this one, showcases one of the must abundant, prolific, and tasty vegetables in our region. And ironically, the tart dough recipe comes from David Lebovitz, who was the pastry chef at Alice Waters’ restaurant Chez Panisse for many years.  I love savory tarts and have been making them more since the discovery of this tart dough that does not require blind baking (baking just the crust first, filled with dry beans or pie weights) and is incredibly easy to handle thanks to the egg in the dough. I’ve also written about this Tomato and Goat Cheese Tart that uses the same crust. So if you’ve been put off by tarts and the finicky doughs that crumble and break, try this. It makes you look really accomplished and fancy and is delicious. And if you’re really short on time you could even skip the crust and just bake the custard and veggies in a cake pan or cast iron pan until slightly puffed and cooked through.

Swiss Chard Tart

Preheat the oven to 425ºF

1 recipe Tart Dough (recipe follows)

1 large bunch of chard, leaves only, roughly chopped

1 tablespoon butter

1 yellow onion, chopped

2 cloves garlic, minced

Kosher salt and freshly ground black pepper

3 eggs

1 cup whole milk

Zest of 1 small lemon  (optional)

3 tbsp. freshly grated Parmesan (or Gruyère or just plain old cheddar if that’s what you have)

A few pinches of ground nutmeg (optional)

Heat the butter in a wide skillet; add the onion and cook it over medium heat until it is translucent and soft.  Add the garlic, and the chard leaves by handfuls, if necessary, until they all fit.  Sprinkle in a large pinch of salt.  Turn the leaves over repeatedly so that they are all exposed to the heat of the pan, and cook until they are tender, 5 minutes or more.

Make the custard.  Beat the eggs; then stir in the milk, lemon peel (if using), grated Parmesan, and a few scrapings of nutmeg. Stir in the chard and onion mixture. Taste and season with salt and a few grinds of pepper.  Pour the filling into the prepared tart shell and bake until the top is golden and firm, about 40 minutes.

Tart Dough

–Adapted from David Lebovitz

1 1/2 cups all-purpose flour 
(or ¾ cup apf and ¾ cup whole wheat pastry flour)

4 1/2 ounces, about 9 tablespoons unsalted butter, chilled, cut into cubes

1/2 teaspoon salt

1 large egg

2-3 tablespoons cold water

Make the dough by mixing the flour and salt in a bowl. Add the butter and use your hands, or a pastry blender, to break in the butter until the mixture has a crumbly, cornmeal-like texture.

Mix the egg with 2 tablespoons of the water. Make a well in the center of the dry ingredients and add the beaten egg mixture, stirring the mixture until the dough holds together. If it’s not coming together easily, add the additional tablespoon of ice water.

Gather the dough into a ball and roll the dough on a lightly floured surface, adding additional flour only as necessary to keep the dough from sticking to the counter.

Once the dough is large enough so that it will cover the bottom of a 10-inch tart pan and go up the sides, roll the dough around the rolling-pin then unroll it over the tart pan. “Dock” the bottom of the pastry firmly with your fingertips a few times, pressing in to make indentations. (I occasionally forget to do this with no ill effect so don’t sweat it if you forget.) If you don’t have a tart pan you can use a 9 or 10-inch pie pan too. The recipe for the dough is pretty generous so will fit a pie pan too.

Happy Cooking and Eating!

Katherine

Corn Meal Pancakes & New Lunch Time Classes

My husband referred to our four-year-old as the breakfast tyrant this morning. And it’s true. I’m not sure how and when it started but the first thing he says when he wakes up now is: “Can we have crepes for breakfast?” and without waiting for my reply he usually adds: “We have enough milk, don’t we? And eggs?!”  If I say no (to the crepes) he turns to pancakes or waffles or biscuits. . . I love to cook. I cook several times a day every day and making crepes in a blender is practically as fast as cutting up some fruit for him and adding it to his muesli and granola which is the everyday breakfast around here. But on weekday mornings, the answer is often no. But not on weekends.

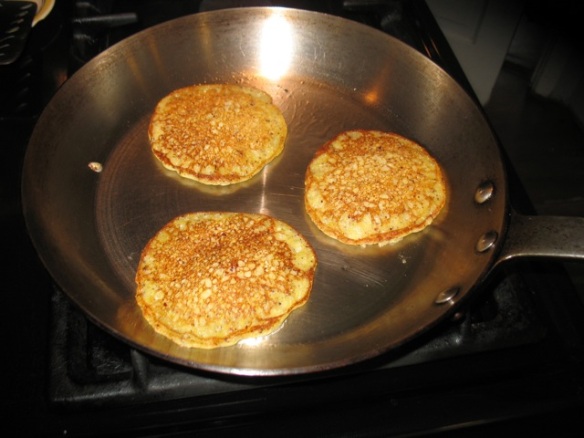
Another good thing about these pancakes is that they cook in a flash.

On Saturday we had crepes but on Sunday we had my favorite–corn meal pancakes. He loves them too and so it didn’t take much convincing. I’ve been making these–an adaptation from an old Joy of Cooking recipe–for many, many years. And each time I make them I wonder why I would ever make any other kind. They are light and lacy around the edges if don’t skimp on the oil in the pan. They have a little crunch and wonderful fragrance thanks to the lemon zest. I often add blueberries straight from the freezer to the batter. They are wonderful served with jam, with syrup, with a fruit compote or with greek yogurt and chives and I’m sure with most things you might think of.

Blueberries and lemon zest are a wonderful combination. I neglected the blueberries in this weekend’s version but I’ll have another opportunity soon thanks to the breakfast tyrant.

They are a bit thinner than regular pancakes and they are best with a medium to coarse grind of corn meal and even better if the corn meal is fairly fresh. We happen to be fortunate enough to have a local farm (several now actually) who sell freshly milled grains. A commercially available medium grind corn meal or polenta work well too. The corn meal is mixed with boiling water and gets to sit for 10 minutes which softens the crunch.

One of the corn meals I buy is called Roy’s Calais and has beautiful reddish flecks in it.

Corn Meal Pancakes

–adapted from The Joy of Cooking

1 cup medium or coarse white or yellow corn meal

1 teaspoon salt

1 – 2 tablespoons honey, syrup or sugar

1 cup boiling water

1 egg

1/2 cup milk (preferably whole milk)

2 tablespoons melted butter

the zest of one lemon, finely grated

1/2 cup whole wheat flour or all-purpose flour

2 teaspoons baking powder

oil for frying

Whisk the salt and sugar into the cornmeal in a medium bowl. Carefully whisk in the boiling water and syrup or honey (if using that instead of sugar) since the hot water will prevent it from clumping. Cover bowl with a plate or lid and let stand for 10 minutes.  Meanwhile whisk the egg with the milk and melted better. Mix the flour and baking powder in a third bowl. Add the egg and milk mixture to the cornmeal; add the lemon zest and flour mixture. Combine quickly. Add blueberries here if you’re using them.

Fry the pancakes in a hot, oiled pan. They only take about 90 seconds per side. Flip when the edges appear golden and the bubbles begin popping on the surface.

Makes about 12 4-inch pancakes.

P.S. you can also make fancy pancakes for the young or young-at-heart at your table–see below!

Cowboy boot pancake–hard to flip but very fun.

P.P.S. I’m launching my new Lunch Time classes next week. So depending on your locale (I’m in Portland, OR) and lunch routine, the classes I’ve scheduled over the next couple of months might be appealing. You won’t have to pack a lunch or buy one (elsewhere!) and you’ll get to learn a couple of new one-dish meals that make for excellent leftover lunches and enjoy a delicious meal! And knowing my love of desserts, I’ll spare you that mid-afternoon cookie run by sending you off with a sweet treat of some kind.

So check out the lunch-time classes here and sign up! I’m in inner SE Portland, very close to downtown, in case that’s where you find yourself during the day. . . .Classes are from noon – 1:30pm, February 24, Mar 17, and April 14.

Cabbage, etc.

"Clean out the fridge" winter lunch

It’s taken me a year and a half to articulate what exactly it is I’m trying to do with my business–Cook With What You Have (through the classes I teach, this blog, etc.).  The name really speaks for itself and even the words I used to describe the business/approach/philosophy at the outset are more or less the same ones I would use now. But these words, these ideas, are really sinking in in a more profound way than they did when I started this (ad)venture. They are sinking in thanks to my students, my neighbors, my chef friends, strangers in the grocery store and at the farmers markets, . . . And yesterday’s lunch!

Two kinds of cabbage and chard . . .

Yesterday’s lunch was a result of various factors: 1) the previous day had seen two birthday parties (one with kids from Ellis’ school and one with family members) laden with treats of all kinds, but plenty of sweet ones. 2) yesterday was also Superbowl Sunday and I knew there would be lots of heavy foods, and 3) I needed to clean out my fridge to make room for the new haul from Sunday’s Hillsdale Farmers Market run.  I found 1/4 of green cabbage starting to brown around the edges, and 1/2 a red cabbage with similar signs and 1/2 a bunch of slightly wilty chard. After a rinse and a trim they looked much better (as do I:)!) and 10-15 minutes in the saute pan with a little olive oil and salt, they were damn near perfect.

So the above paragraph illustrates theme one of CWWYH (Cook With What You Have). Use what you’ve got. Now theme two (really en elaboration of theme one) would manifest itself as follows: If you like/have eggs on hand, scoot that cabbage over and fry a couple of eggs in the same pan. Serve them on top of the veggies sprinkled with good salt, drizzled with good olive oil and a few grinds of pepper. If you like/have bread on hand, toast a piece and dig in. If you like/have sausages in the freezer (like I do for just these occasions), slice one up and brown it and mix in.

Theme three might be considered the analytical part of the above story. Cooking can be fun, quick, delicious, cheap and not scary at all if you have things in your house you like, are not afraid to use salt and fat and taste the food as you’re preparing it. A little creativity can go a long way in making every day meals not so daunting.

And don’t get my wrong. I love cookbooks and recipes and food that’s a bit more involved than the above, but what we (collectively) seem to sometimes forget or not realize, is just how easy and fun and tasty food can be on the fly. And we get better and better at tossing things together like this if we have fresh produce on hand, experiment with ingredients we (our children, partners. . . .) like and are confident enough to look at a recipe and use it to our advantage rather than be enslaved by it.

Happy Cooking & Eating!

Katherine

P.S. Apropos fresh produce and local farmers (here in Oregon) there is a bill in the Oregon Legislature that will clarify and provide sound standards for on-farm production of items many of us love and rely on. Below is testimony by Anthony Boutard of Ayers Creek farm on the matter and an email for the committee administrator of House Bill 2336 in case you’d like to weigh in in support of this very well-crafted bill.

Committee Administrator, Liz Puskar:  [email protected]

Testimony of Anthony Boutard in Support of HB 2336 Before The House Committee on Agriculture and Natural Resources 2 February 2011

Chairs Jenson and Clem, members of the committee,
For the record, my name is Anthony Boutard. My wife and I own and manage Ayers Creek Farm in Gaston, Oregon. We are small family fruit, vegetable and grain farm. We sell to grocery stores, restaurants and directly to the public. I served as a member of the committee’s working group that put together HB 2336.

At the outset, I want to thank my representative, Matt Wingard, for chairing the working group. He kept us on task and working productively. I also appreciate the contribution made by the staff of the Oregon Department of Agriculture (ODA) and the representatives of the Oregon Farmers’ Market Association (OFMA).
Over the last two decades, agriculture in Oregon has seen a marked increase in venues for selling agricultural products directly to the consumer. Farmers’ markets, community supported agriculture (CSA), and buying clubs have increased without a clear place in the regulatory structure. Historically, roadside stands selling produce, eggs and honey have been exempt from licensing, but these new venues stretch that definition. It is essential that the legislature provide statutory guidance on this issue, and I am grateful that the committee is doing so. As a farmer who sells directly to consumers, as well as processors and large retail stores, I believe this bill provides a balanced and sensible regulatory approach to direct marketing.
The bill identifies foods that, from a food safety perspective, are regarded as either non-hazardous, or minimally hazardous, and that can be safely produced by the farmer, and sold directly to the consumer without licenses or inspection. With the help of ODA staff, these definitions are also tightly drawn. Foods that pose a greater hazard, such sprouts, low-acid canned vegetables and fruits, and baked goods, are not included and must be processed in a licensed facility. It must be stressed that farmers’ market rules still prevail, regardless of licensing requirements. These organizations will still determine who can participate in the market, and what they can sell.
With its provisions regarding preserves and pickles, this bill provides room for innovation at the small farm level. New ideas invariably start at this level whether it is in some one’s kitchen or garage. Oregon’s craft brewing industry developed after laws prohibiting the brewing and selling of beer in the same establishment. Allowing farmers to try out new products at a small, manageable scale is an important step in fostering innovation. HB 2336 also includes a provision that allows the ODA to expand the list of foods that can be prepared at the farm, consistent with food safety. With the $20,000 annual limit on sales of these foods, the bill set up a clear threshold where the farmer must shift into a licensed facility.

I urge the committee to pass this bill with a “do pass” recommendation. The lack statutory clarity has festered too long and all of parties involved, the ODA, the farmers, and farms’ market organizations, need the guidance provided by this bill.

Thank you for the opportunity to testify in support of HB 2336.

Anthony Boutard
Ayers Creek Farm
Gaston, Oregon